7 Tips for Getting Started with Amazon FreeRTOS
Nearly every company at this moment is rushing to connect their products to the internet. The IoT has become the modern-day gold rush only the gold is data. Companies are discovering that by connecting their devices, they aren’t only able to change to a subscription-based business model but can innovate their products in ways they had never considered. One of the tools making this transition possible is a free and open source real-time operating system, Amazon FreeRTOS. In this post, I’ll provide my top seven tips for getting started with Amazon FreeRTOS.
Tip #1 – Download the source through github
Developers can download Amazon FreeRTOS through the AWS IoT Console which seems convenient and is probably the way most first-time users get the code base. However, there are several advantages to downloading Amazon FreeRTOS through github (https://github.com/aws/amazon-freertos) instead. These include:
- Ability to watch and be notified when changes are made
- Branching off the mainline into your own repository
- Easily pull updates into your code base
- Access to all demonstration code for all hardware variants
Using github will save developers several hours and a lot of pain compared to using the IoT console.
Tip #2 – Try Amazon FreeRTOS on multiple hardware targets
Currently, there are approximately seven different hardware platforms that support Amazon FreeRTOS. These include:
- Espressif ESP32
- Infineon XMC4800 IoT kit
- Microchip Curiosity PIC32
- NXP LPC54018 IoT module
- ST Microelectronics STML475 Discovery IoT Node
- Texas Instruments CC3220 Launchpad
While the demonstration code across the hardware platforms is the same, I found that each hardware platform presented its own challenges and insights that helped me to better understand the implementation model and what each platform offers. For example, I found that the CC3220 has some interesting security features that could help thwart hackers trying to modify the code.
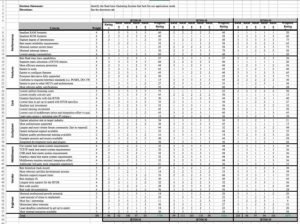
Tip #3 – Explore the architecture using Tracealyzer
When you first fire-up Amazon FreeRTOS, the demonstration code provides an example on how to connect to Amazon Web Services (AWS) and transmit messages to the server. After approximately 60 seconds, the application completes and stops sending messages. The demonstration contains a lot of behind the scenes code directly related to the architecture that is critical to understand if a developer wants to create a product using Amazon FreeRTOS. The best way to understand how this code works is to use a tracing tool such as Percepio Tracealyzer to record all the events that are occurring in the application. A developer can then view how many tasks exist, how they interact, how the heap is used and even CPU utilization to give a few examples. Getting this picture on how the application executes is worth a thousand lines of code.

Image Source: Beningo Embedded Group
Tip #4 – Setup your AWS settings first
The biggest challenge that I faced in getting my first Amazon FreeRTOS application to connect to AWS was getting AWS configured correctly. I started at the hardware and then worked my way to the cloud. I should have started in the cloud and worked my way to the hardware. The reason is that you won’t have any success with the hardware unless you have configured AWS with:
- A thing
- An active certificate
- An active policy (connect, publish, receive, subscribe, etc)
Even with these in place, I discovered that the documentation did not have the correct policy settings and it took trial and error to get it right.
Tip #5 – Modify the demonstration for multiple topics
A great way to verify you understand a code base is to modify it. Modifying the example demonstration to support multiple topics is a perfect first test. The demonstration by default only supports a single topic. I recommend that you modify the demonstration code to perform the following:
- Subscribe to multiple topics
- Publish to those multiple topics
- Receive information from those topics
- Affect the system behavior based on received information
Once you able to do these activities and are comfortable with them you’ll be ready to start working on your own application.
Tip #6 – Layout the architecture before you start your application
Amazon FreeRTOS already comes with certain preconditions and assumptions about the software architecture for the application. If a developer makes changes purposely or inadvertently, they may break the underlying system. It’s important to document the existing tasks, their timing and behavior before adding in your own tasks and application code. I recommend taking some time to draw up a software architecture and map out what you measured from the demonstration code using Tracealyzer and then add in your assumptions about how your code will behave. This should minimize uh-ohs!
Tip #7 – Take a class
Taking a class can help you quickly learn the ins and outs of the RTOS along with the do’s and don’ts and provide you with access to a knowledgeable developer who can shorten the learning curve and point out pitfalls. At the moment, the only course I’m aware that covers Amazon FreeRTOS is my online “Getting Started with Amazon FreeRTOS” course. I specifically designed it to help developers who are transitioning into designing and building connected systems learn how to properly architect their system and get up to speed with cloud services.
Conclusions
Getting started with Amazon FreeRTOS seems easy enough but just like with everything, there is a learning curve associated with it. I’ve had the opportunity to spend quite a bit of time digging into the details and designing systems that use it. In this article, we’ve examined several tips that I would recommend the reader follow if you are interested in getting up to speed on Amazon FreeRTOS quickly.
Going Further
If you found these helpful, check-out my “Designing IoT Edge Nodes using Amazon FreeRTOS” online course here.
You may also want to check-out my embedded.com articles:
- A peek inside Amazon FreeRTOS
- A peek inside Amazon FreeRTOS: Communication and memory
- A peek inside Amazon FreeRTOS: Publishing messages to the cloud
- A peek inside Amazon FreeRTOS: Receiving messages from the cloud
Struggling to keep your development skills up to date or facing outdated processes that slow down your team, raise costs, and impact product quality?
Here are 4 ways I can help you:
- Embedded Software Academy: Enhance your skills, streamline your processes, and elevate your architecture. Join my academy for on-demand, hands-on workshops and cutting-edge development resources designed to transform your career and keep you ahead of the curve.
- Consulting Services: Get personalized, expert guidance to streamline your development processes, boost efficiency, and achieve your project goals faster. Partner with us to unlock your team's full potential and drive innovation, ensuring your projects success.
- Team Training and Development: Empower your team with the latest best practices in embedded software. Our expert-led training sessions will equip your team with the skills and knowledge to excel, innovate, and drive your projects to success.
- Customized Design Solutions: Get design and development assistance to enhance efficiency, ensure robust testing, and streamline your development pipeline, driving your projects success.
Take action today to upgrade your skills, optimize your team, and achieve success.