C++ Project Setup using STM32 Microcontrollers
C++ has been slowly gaining momentum within the embedded systems space. You’re probably well aware that many microcontroller vendors provide C libraries and interfaces to speed up development, with fewer companies using C++. C++ offers you a rich modern programming language that can help solve many portability, reuse, architectural, and efficiency issues, to name a few. This post will explore getting an embedded C++ project up and running on an STM32 microcontroller using STM32CubeIDE.
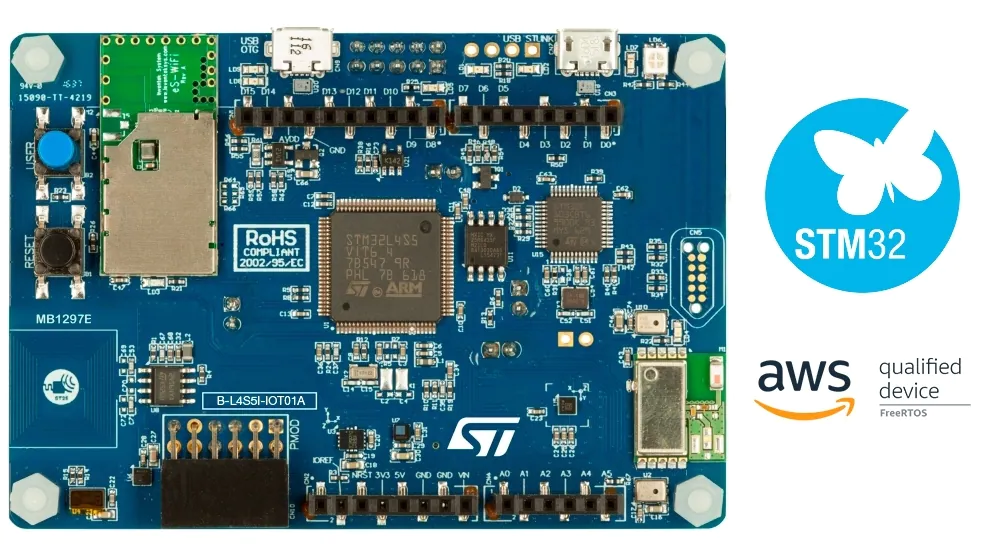
If you are interested in following along, all you need is an STM32 development board of your choosing. I will be using the B-L4S5I-IOT1A development board. You also will want to download the latest version of STM32CubeIDE if you don’t already have it installed.
C++ Project Creation
They usually get worried when you talk to an embedded developer about setting up a C++ project. They picture the need to set up makefiles, startup code, compilation flags, and many other activities they may not be intimately familiar with. To simplify our first C++ project setup, we will leverage the project creation tools available in STM32CubeIDE.
First, you open STM32CubeIDE and select your preferred workspace. Then from the file menu, choose New -> Project -> STM32 Project. Next, the tool will likely check with the internet and download the latest packages. Once this is done, you’ll find yourself at a target selection screen that looks something like the following:
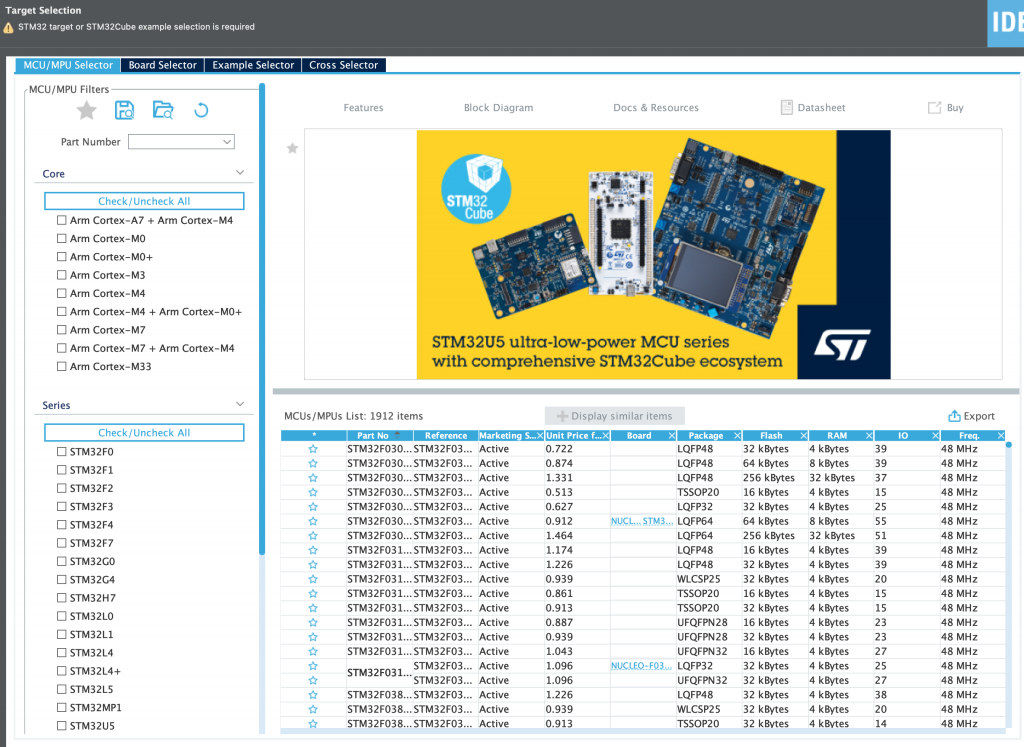
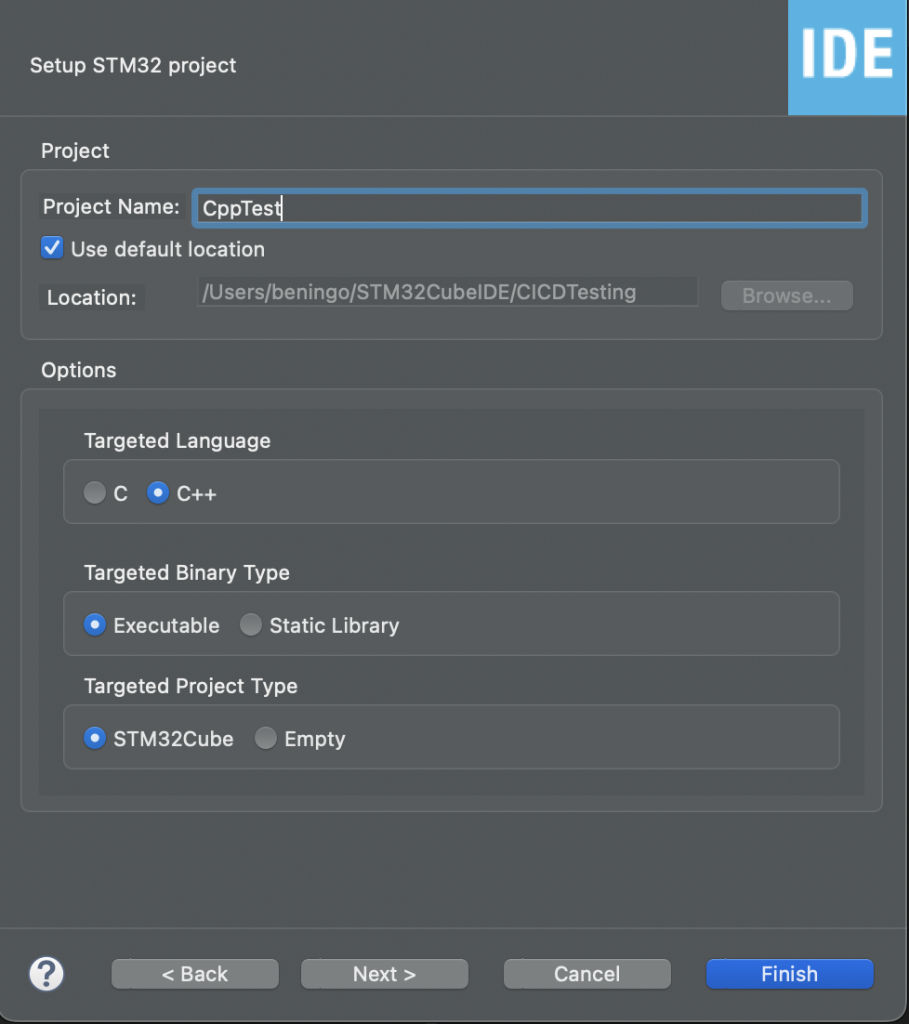
You can click the Board Selector tab from the selection menu and search for your preferred development board. Once found, click it and then press next. In the project setup, you can give the project a name like CppTest. More importantly, you’ll notice that there is an option to select between a C or C++ project. The default is a C project. Click C++ as shown below and then next to create the project.
Note: I like to initialize all the peripherals based on the development board. Doing so will configure your microcontroller for everything on your development board, saving manual setup time.
Why does it look like a C project?
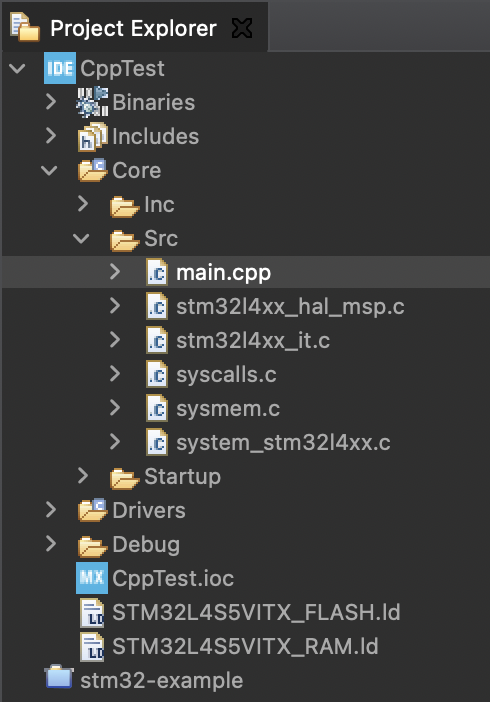
You’ll be in the STM32CubeIDE configurator when the project creator is complete. If you open the project explorer and examine the files, you’ll notice that all the files have standard C file extensions like .c and .h. Why does the project look like a C project and not a C++ project? (See below that main is main.c NOT main.cpp)
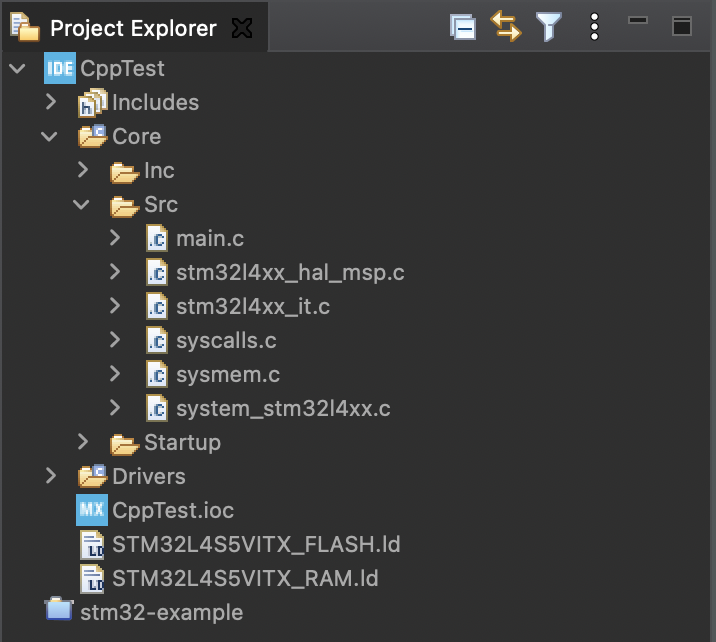
It turns out that ST Microelectronics has written all their libraries and configuration tools for C projects! You might be feeling a bit bummed out right now, but the good news is that we’re okay with that. We can still leverage the STM32 libraries and write C++ code! However, before we do that, we need to make a minor adjustment to our project.
First, if you are in the configurator view, go to the menu Project -> Generate Code. The tool may ask to switch to the code view, which is fine. Next, in explorer, right-click main.c and select rename. Now, change the extension from .c to .cpp. For example, your project should now look as follows:
Compile the Embedded C++ Project
At last, we are ready to compile the project. From the menu, select Projects -> Build All. It may take a few minutes, but you should find that the project compiles. Now, take a moment to examine the compiler output.
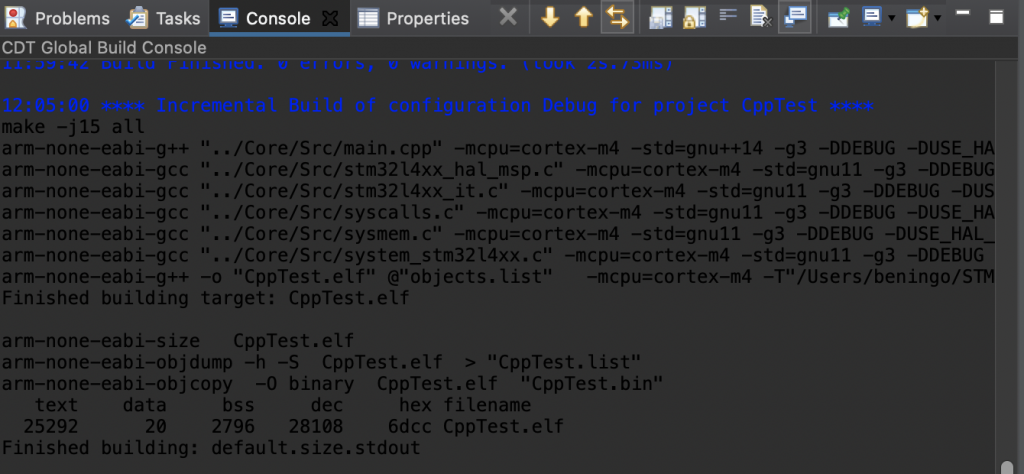
Notice that for main.cpp, arm-none-eabi-g++ was called, and for the STM c files, the arm-none-eabi-gcc compiler was called. So, finally, we can see that our project is indeed set up for C++!
Adding a Test Class
Our C++ project compiles, but we don’t have any C++ code in the project. Instead, we have a bunch of C code and a main.cpp module with C code in it that compiles with g++. Let’s now create a simple object to be called by our application to prove that we can add C++ code to the project.
A great simple test will be to create an initialized object with a value from 0 to 255 that acts as a counter object. The object will have an increment and a get function and contain a single variable for keeping track of the current count. The C++ code for such an object is below:
using namespace std;

struct TestCPP
{
    TestCPP() : Counter(0) {}
    TestCPP(uint8_t Value) :
	Counter(Value){}

    void Increment(void)
    {
        Counter++;
    }

    uint8_t Get(void)
    {
        return Counter;
    }

private:
    uint8_t Counter;
};Explaining the C++ code is beyond today’s scope, but you can see that we have two different constructors. One constructor initializes Counter to zero if a value is not provided. The second constructor initializes Counter with the provided value. You may wonder why I’m using a struct, not a class. A struct is a class object, but the default is that the struct has public members.
Writing some Test Code
Within the main function, you can add code to create the test object and use it as shown below:
  TestCPP TestObj(3);

  /* USER CODE END 2 */

  /* Infinite loop */
  /* USER CODE BEGIN WHILE */
  while (1)
  {
    /* USER CODE END WHILE */
    TestObj.Increment();

    if(TestObj.Get() > 100)
    {
        printf("The value is greater than 100!\r\n");

        while(true);
    }
    /* USER CODE BEGIN 3 */
}You can see in. the code above we instantiate TestObj with. the value of 3, setting the private Counter variable to 3. Then, in the infinite while loop, we increment the Counter and use the Get() method to test whether the current count is greater than 100. At this point, if you were following along, you should be able to compile the code and debug it!
Running the Embedded C++ Project
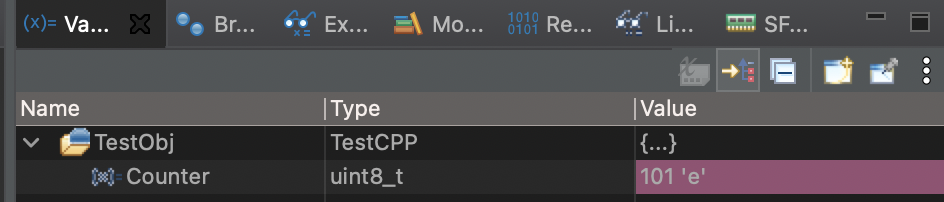
Clicking the debug button in the STM32CubeIDE environment will get you to where your code is compiled, flashed to the system, and at the entry point in main(). I recommend two things here. First, step through the code and watch that TestObj Counter gets initialized to 3. next, set a breakpoint at the print statement and let the code run. When. you get to the breakpoint; you should see the following:
You now have an STM32 project that can compile and run C++ code! With this setup, you can now explore C++ programming within an embedded environment!
Conclusions
Getting an embedded environment up and running doesn’t need to be an enormous effort. You can leverage the STM32 toolchain to set up the project for you. You can then start to add your own application modules in C++. Underneath the hood, you can still use the STM32 C libraries to accelerate your software development. However, you can use C++ for your high-level application code to improve your architecture, reuse, and portability.
If you are interested in learning more about C++ in an embedded environment, Jacob’s other C++ Posts, or feel free to email him at [email protected] for training, mentoring, and consulting assistance.
Struggling to keep your development skills up to date or facing outdated processes that slow down your team, raise costs, and impact product quality?
Here are 4 ways I can help you:
- Embedded Software Academy: Enhance your skills, streamline your processes, and elevate your architecture. Join my academy for on-demand, hands-on workshops and cutting-edge development resources designed to transform your career and keep you ahead of the curve.
- Consulting Services: Get personalized, expert guidance to streamline your development processes, boost efficiency, and achieve your project goals faster. Partner with us to unlock your team's full potential and drive innovation, ensuring your projects success.
- Team Training and Development: Empower your team with the latest best practices in embedded software. Our expert-led training sessions will equip your team with the skills and knowledge to excel, innovate, and drive your projects to success.
- Customized Design Solutions: Get design and development assistance to enhance efficiency, ensure robust testing, and streamline your development pipeline, driving your projects success.
Take action today to upgrade your skills, optimize your team, and achieve success.