5 Boards that Make Rapid Prototyping Easy
There are many instances in a product development cycle where a developer will want to create a rapid prototype. A developer may want to create an entire system, learn how to interface with a sensor or work through an implementation for a new algorithm. I’ve often found that when trying to understand or prove something, it’s helpful and efficient to leverage existing development boards, break-out boards and software to speed up the process. After all, if the concept isn’t going to work, I want to fail fast so that I can find a better solution. In today’s post, I’m going to share five of my favorite development boards that I use for rapid prototyping.
Board #1 – BreadShield
One development board that I have found to be particularly useful for prototyping when a breadboard is required is the BreadShield. This board is interesting because it has standard Arduino connectors for stacking shields but also has linear header pins that can connect to a breadboard. I love this because I usually hate running jumpers or wires from a development board to a breadboard. It’s messy and leaves an easy opportunity for a connection to come lose which then leads to an unexpected debug session. The board is open source on github which means you can spin your own if you wanted to.
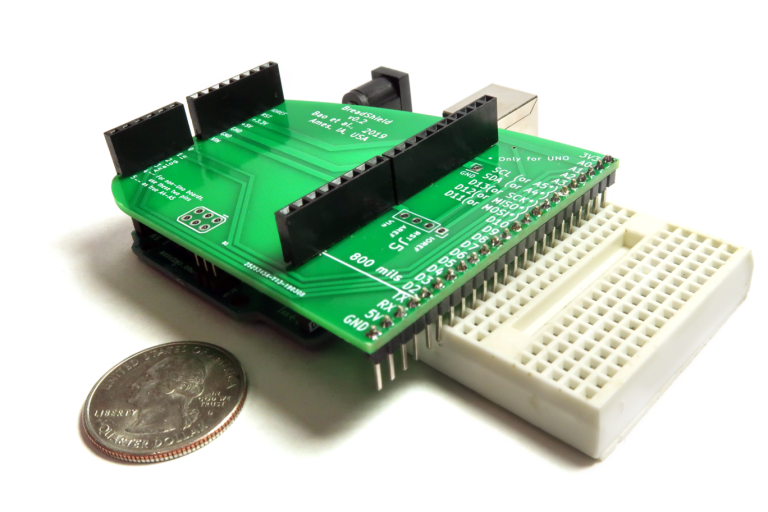
Image Source: https://github.com/forrestbao/BreadShield
Board #2 – Arduino Protoscrew Shield
The BreadShield is great for use with breadboards, but sometimes a developer will want to take a rapid bench-top proof-of-concept and put it into an enclosure. Whenever I need to build a one-off, I’ll often use a screw terminal expansion board like the Arduino Protoscrew Shield. These types of shields provide a developer with the standard Arduino headers, which are present on many development boards these days, but also screw terminals for wired connections. Personally I like these boards because it provides a more robust connection to sensors and others devices than you would normally have if you just used plain wires or jumpers. It is also helpful to have power LEDs and a digitally controlled LED to verify that power is applied and that the microcontroller is running.
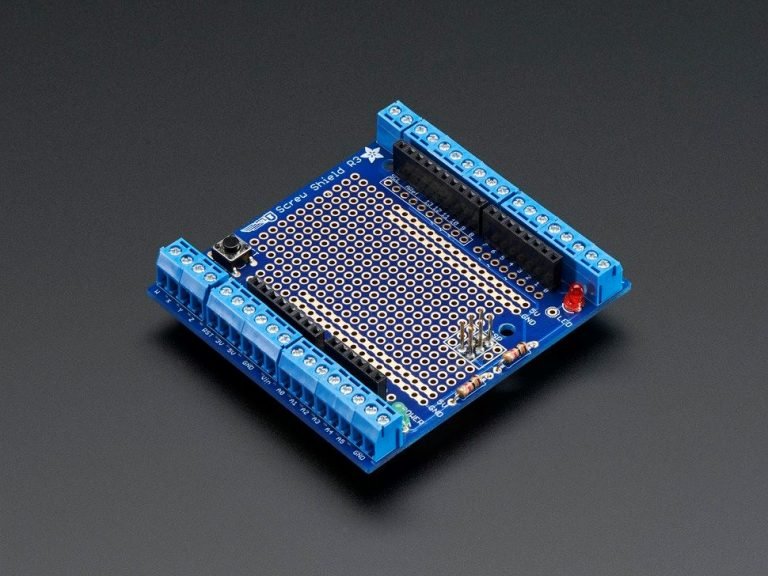
Image Source: https://www.adafruit.com/product/196
Board #3 – The MicroPython Pyboard D-Series
When it comes to proving that something will work conceptually, it isn’t necessary to spend months developing embedded software in C/C++. A rapidly prototyped system doesn’t have to be lean and efficient and minimize memory footprints. When I am trying to prove a concept or even learn how to interface to a new sensor or chip, I’ll often use MicroPython. MicroPython allows a developer to write high-level scripts and focus on the task at hand rather than low-level hardware registers and features. It also doesn’t require a complex development environment. All a developer needs is a text editor and a terminal.
When it comes to MicroPython, there are a lot of development boards that are supported. The reader can find a full list in the MicroPython git repository. However, there are two different boards that I typically use. The first is an STM32L4 IoT Discovery Node. This board is interesting because it has the Arduino Shield connectors which makes it very easy to stack shields and devices to prototype easily. The only problem is that if a developer uses the STM32L4 board, they will have to put MicroPython on the board themselves, which isn’t that big of a deal. However, to avoid this step, it’s just as easy to use the MicroPython flagship development board, the Pyboard D-Series which comes as a stand-alone module with Wi-Fi and Bluetooth! (Shown below).
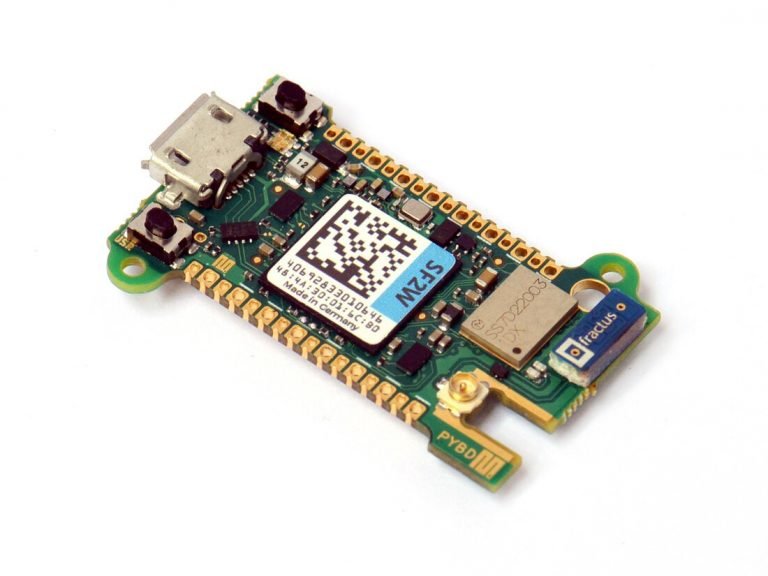
Image Source: https://store.micropython.org/
Board #4 – CAN Waveshare Transceiver Board
The controller area network (CAN) interface is quite popular among several different industries but a problem I have often encountered is that low-cost development board do not include a CAN transceiver on their development boards! This means that your microcontroller might support CAN but you don’t have the correct physical layer in place to actually connect to a CAN bus! A low-cost CAN transceiver development board that I use is the Waveshare CAN board. This board provides the CAN high and low lines that are necessary for the CAN physical layer and then the CAN Tx and Rx lines that are needed by a microcontroller.
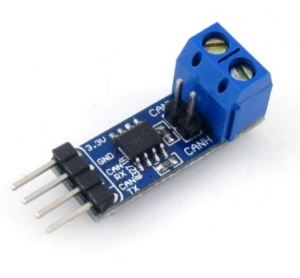
Image Source: https://www.waveshare.com/sn65hvd230-can-board.htm
Board #5 – SparkFun Edge Development Board – Apollo3 Blue
The last development board that we will discuss in this article is the Sparkfun Edge development board. This development board was designed specifically for developers who are interested in working with machine learning on microcontrollers. The Edge development board was developed with a collaboration between Google and Ambiq. The board allows developers to use Tensorflow Lite to develop applications for voice and gesture recognition along with many other machine learning at the edge type applications.
Image Source: https://www.sparkfun.com/products/15170
Conclusions
Development boards and break-out boards have become an essential component to developers. When I first started my career, development boards were very expensive and it was often necessary to create custom break-outs. Today, thanks to the maker movement among many others, these boards are now inexpensive and readily available. We’ve looked at just a few boards that I personally like and use but there are certainly plenty of others. Make sure that you keep the useful ones in your toolbox so that you can quickly prove out concepts!
Struggling to keep your development skills up to date or facing outdated processes that slow down your team, raise costs, and impact product quality?
Here are 4 ways I can help you:
- Embedded Software Academy: Enhance your skills, streamline your processes, and elevate your architecture. Join my academy for on-demand, hands-on workshops and cutting-edge development resources designed to transform your career and keep you ahead of the curve.
- Consulting Services: Get personalized, expert guidance to streamline your development processes, boost efficiency, and achieve your project goals faster. Partner with us to unlock your team's full potential and drive innovation, ensuring your projects success.
- Team Training and Development: Empower your team with the latest best practices in embedded software. Our expert-led training sessions will equip your team with the skills and knowledge to excel, innovate, and drive your projects to success.
- Customized Design Solutions: Get design and development assistance to enhance efficiency, ensure robust testing, and streamline your development pipeline, driving your projects success.
Take action today to upgrade your skills, optimize your team, and achieve success.