Streamline Your Development: Integrating NXP MCUXpresso SDK with Docker
An important step in streamlining your development is to integrate your project with Docker so that you can build it on a DevOps platform like GitHub or GitLab. Containerizing your build and test system can ensure your team is using the same tools configured the same way and ease testing and deployment. How many times have you fought with issues caused by colleagues having different versions of tools or libraries? Containerizing your build system and tools can resolve these issues and act as a launching point for leveraging DevOps processes.
In Visual Studio Code: A Guide to the MCUXpresso for VS Code Extension, I introduced how to work with the MCUXpresso for VS Code Extension along with how to create a LPCXpresso55s69 LED blinky project. Today’s post will explore how to containerize your build system. However, before we can do that, we must first integrate our blinky LED project with GitHub.
Integrating the LPCXpresso55s69 LED Blinky Project with GitHub
When you use the MCUXpresso for VS Code Extension to create a project from an existing example, it creates a project on your host but is not connected to your git repo. Before containerizing our build system and creating a CI/CD pipeline, we must get our NXP project onto Github.
The easiest way to connect the project is to leverage VS Code. Alternatively, you could use your GitHub account and create a new repository.
Note: I created a new private repo named lpcxpresso55s69_led_blinky.
Go to your Visual Studio Code project and open a new terminal by clicking Terminal->New Terminal from the top menu. In the terminal, the default path should be your lpcxpresso55s69_led_blinky project. You’ll need to navigate to that path if you are somewhere else.
Start by initializing the local project folder as a git repo by running the following command:
git initIf you haven’t set up your global git configuration, you may get hints about how to name your main branch. I personally like to name the main branch main. If you don’t have your global configuration set up, you can set the branch to main by running the following command:
git branch -m mainThe git repo is initialized, but there is still nothing in it. You can add the current project files and commit them to the repo by using the following commands:
git add -Agit commit -m “commit baseline blinky project from NXP”When I ran these commands, I got about 100 files that were added to the repo, as can be seen below:
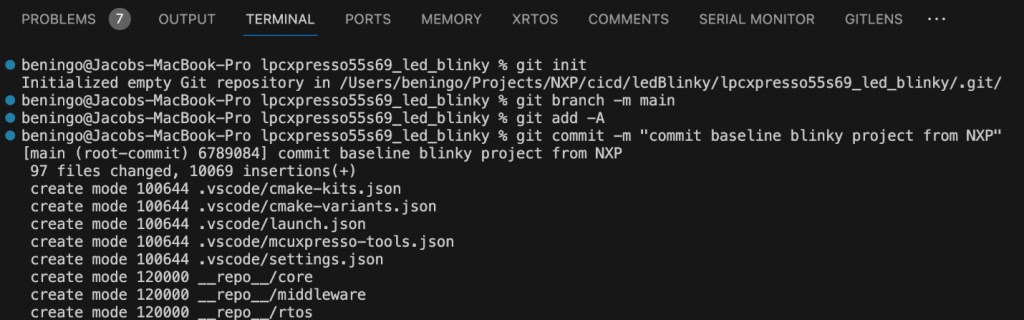
Figure 1 – Committing the NXP lpcxpresso55s69_led_blinky project to GitHub
Now, you can create a new repo on GitHub by going to the source control extension in VS Code. Click Publish, and VS Code will then walk you through the process of creating a new repo.
When you are done, if you look at your Github repo, it will look something like the following:
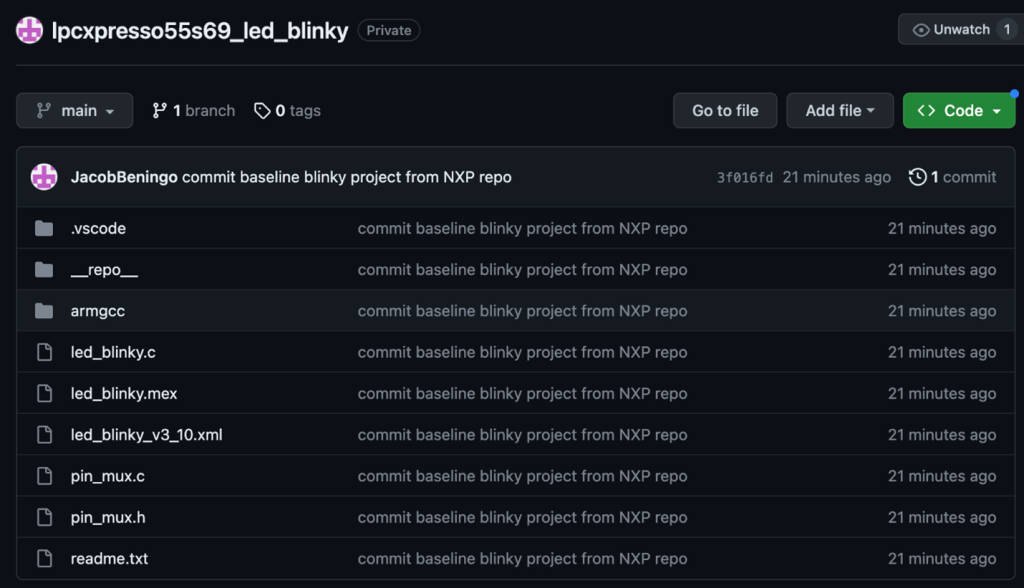
Figure 2 – GitHub project after successfully pushing the LED blinky project.
Congratulations! Now your code is up on Github! Let’s dive into how to set up and configure a Docker container for our build environment.
Why use a Docker Container
Once you containerize your build system, you’ll never want to go back! I remember the first time I heard about Docker and containers. While an intriguing and exciting concept, I wasn’t sure they would provide much value to embedded developers. However, we’re engineers and can’t let gut feelings or doubt lead the way. We must push forward, experiment, collect data, and understand.
As it turns out, there are at least three goals that containers can help embedded software developers achieve such as:
- A build environment that we can use as part of our CI/CD pipeline
- A build environment that we can give to our colleagues to minimize setup and ensure the correct versions and tools are used
- A scalable and flexible environment that works across multiple platforms
These are simple goals, yet very powerful. They allow your code, no matter where it goes or who has it, to have a blueprint for creating an environment that builds, analyzes, tests, and deploys the software. If done right, each environment will use the same tools, which means no configuration or versioning issue between developers. That alone is probably worth a developer’s weight in gold!
Now that you are convinced about the value containers provide, let’s look at how to create a Docker container that we can use to build our NXP projects locally on our host or in our CI/CD pipeline.
Writing a Dockerfile
A Dockerfile is a blueprint of an image that can be built to form a container. Dockerfiles contain a series of labels that define important image features such as what to use for a base image, the value of environment variables, and, most importantly, what software packages to install! Identifying some of these details is easy. For example, using a Linux base image such as ubuntu 20.04 is. From Linux, we can easily run apt-get and other package managers to install our software.
There are other details of an image, though, that take careful consideration. For example, what packages do you need to install? The answer will truthfully depend on what you want to do and how you want to do it! We all have our tool preferences, and the tools you want to use might be slightly different than the ones I want to use. Nevertheless, a great place to start is simply stating what you want to do.
Our ultimate goal is to create a container to build, analyze, test, and deploy firmware to an NXP lpcxpressor55s69 development board that uses the NXP SDK. It’s a simple statement that expands to a lot of complexity. So, we will start today with the simple pieces and then build on our foundation.
The first step is identifying the tools we need to build our application. There are a few obvious ones, such as:
- Make
- Cmake
- Ninja
- Arm-none-eabi compiler
- clang-format
- clang-tidy
There are also a few that may not be obvious but help support the container and tools, such as:
- autoconf
- automake
- curl
- build-essential
- git
We can take these needs and wrap them up into an initial Dockerfile version that looks something like the following:
# Use the latest version of Ubuntu as the base image
FROM ubuntu:latest
# Set the maintainer label
LABEL maintainer=”[email protected]”
# Set environment variables to non-interactive (this will prevent some prompts)
ENV DEBIAN_FRONTEND=non-interactive
# Update package lists, install basic tools, toolchains, stlink-tools, and clean up
RUN apt-get update -y && \
apt-get install -y –no-install-recommends \
autoconf \
automake \
curl \
build-essential \
git \
libtool \
make \
pkg-config \
ca-certificates \
software-properties-common \
clang-format \
clang-tidy \
cmake \
ninja-build && \
apt-get clean && \
rm -rf /var/lib/apt/lists/*
# Install some necessary tools and libraries
RUN apt-get update && \
apt-get install -y wget libssl-dev
# Create and set the working directory to /home/app
WORKDIR /home/app
# Set the default command to bash
CMD [“/bin/bash”]
In our Dockerfile, you’ll notice some strange packages like ca-certificates. Some of these are added so that we can use https to download the arm-none-eabi compiler and install it in our container. The additional text to add to the Dockerfile image to accomplish this can be seen below:
# Setup a tool directory in /home/dev and download the ARM toolchain
WORKDIR /home/dev
RUN curl -L https://developer.arm.com/-/media/Files/downloads/gnu-rm/10-2020q4/gcc-arm-none-eabi-10-2020-q4-major-x86_64-linux.tar.bz2 | tar xj
# Set the PATH environment variable
ENV PATH=”/home/dev/gcc-arm-none-eabi-10-2020-q4-major/bin:${PATH}”
I prefer this method because I can control the exact version of the compiler I get! I’ve occasionally seen entire builds break because the developers always pulled the latest compiler version. A compiler is software, and there are no guarantees that a new version won’t have a bug or change some behavior in your system. It’s best to pick your version and stick to it unless you agree to update it to a new version manually.
Building and Testing the Docker Container
With our Dockerfile script written, we can use Docker to create an image. Creating an image is done by invoking the docker client with the build command. For example, I could create the container beningo/nxp-dev using the following command from my terminal:
docker build -t beningo/nxp-dev .
Running your container is a little more complex but not too bad. To run the container, we invoke the Docker client with the run command along with several parameters to specify the image and behavior. I typically run my containers with the following command:
docker run –rm -it –privileged -v “$(PWD):/home/app” beningo/nxp-dev:latest bash
When you run the above command, you should find yourself inside the docker container loggedin as root in your /home/app folder. For today, let’s verify two items.
First, is cmake installed:

Yes, it is. Now let’s check that the arm compiler is also available:

We now have a working container with our most important build tools that can form the foundation for setting up a CI/CD pipeline.
Conclusions
In this post, we’ve explored how to create a Docker container that encompasses the tools we need to compile a project that uses the NXP MCUXpresso SDK. You will discover, and we’ll discuss it more in the next post, that the SDK is still local to our host. While you saw the benefits of containerizing your build system, we still have some work to do to get the SDK into the container. The container will be critical in our upcoming posts that show how to connect our container and application to a CI/CD pipeline. The container will make it seamless for us to build, test, and deploy our code. Connecting to the CI/CD pipeline allows your team to add daily testing to the Blinky Project. Testing that can uncover bugs contributed by a member of the team before the code propagates through the rest of the team.
Struggling to keep your development skills up to date or facing outdated processes that slow down your team, raise costs, and impact product quality?
Here are 4 ways I can help you:
- Embedded Software Academy: Enhance your skills, streamline your processes, and elevate your architecture. Join my academy for on-demand, hands-on workshops and cutting-edge development resources designed to transform your career and keep you ahead of the curve.
- Consulting Services: Get personalized, expert guidance to streamline your development processes, boost efficiency, and achieve your project goals faster. Partner with us to unlock your team's full potential and drive innovation, ensuring your projects success.
- Team Training and Development: Empower your team with the latest best practices in embedded software. Our expert-led training sessions will equip your team with the skills and knowledge to excel, innovate, and drive your projects to success.
- Customized Design Solutions: Get design and development assistance to enhance efficiency, ensure robust testing, and streamline your development pipeline, driving your projects success.
Take action today to upgrade your skills, optimize your team, and achieve success.