Getting Started with Zephyr RTOS
Zephyr RTOS is overkill.
And that’s exactly why you should learn it.
Most developers start their careers with a bare-metal loop or the smallest RTOS they can find. It works fine for blinking LEDs and reading sensors. But as soon as you need portability, observability, or the ability to scale across dozens of boards, the cracks begin to show.
This is where Zephyr RTOS enters the picture. At first glance, it feels like overkill—device trees, Kconfig, complex build systems, hundreds of subsystems. Why wrestle with all that just to toggle a pin?
Because Zephyr isn’t about the first 10 hours you spend learning it. It’s about the next 10 months and the products and teams you’ll support 10 years down the road. Its steep learning curve is a feature, not a bug.
It forces you to adopt professional practices:
- Separating concerns
- Managing configurations
- Enabling and disabling modules cleanly
- Thinking in terms of scalability and reuse
And the industry momentum is undeniable. Zephyr is vendor-neutral, backed by the Linux Foundation and 45+ member companies (including Beningo Embedded Group). It supports 500+ boards, integrates with modern observability tools like Memfault and Percepio View, and has one of the fastest-growing contributor bases of any RTOS.
In this post, we’ll cut through the complexity and look at why Zephyr is worth considering, what makes it different from traditional RTOSes, and how to get started—whether you’re building with MCUXpresso for Visual Studio Code or using the west command line.
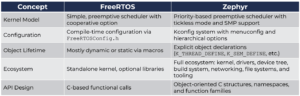
What’s Different from Traditional RTOSes
If you’ve used FreeRTOS or another lightweight RTOS, it’s easy to think that Zephyr RTOS isn’t any different. However, Zephyr RTOS is very much a different animal than your typical RTOS.
For example, you’ll notice a few things immediately:
- The Devicetree (DTS)
Instead of writing board support code by hand, Zephyr uses a Devicetree to describe hardware. At first this feels like extra work and may even seem extremely confusing! But it’s what enables Zephyr to support hundreds of boards cleanly. Portability isn’t an afterthought—it’s built in.
- The Kconfig System
Configuration in Zephyr happens through Kconfig, which allows you to enable and disable features across your project. FreeRTOS typically requires you to edit a FreeRTOSConfig.h header. Zephyr takes a more scalable, modular approach, closer to how the Linux kernel works.
- Subsys and Drivers
Zephyr comes with a wide array of subsystems and drivers out of the box such as networking stacks, file systems, USB, BLE, sensor frameworks, and more. With FreeRTOS, you’re often stitching together third-party middleware yourself.
- Build System
Zephyr uses CMake and west for builds and project management. FreeRTOS doesn’t enforce a build system, which makes it simple to install but harder to scale for larger projects.
In short, FreeRTOS feels like a microkernel you expand yourself. Zephyr feels like a full ecosystem with tooling, configuration, and portability baked in. That’s why the learning curve is steeper—it’s solving bigger problems.
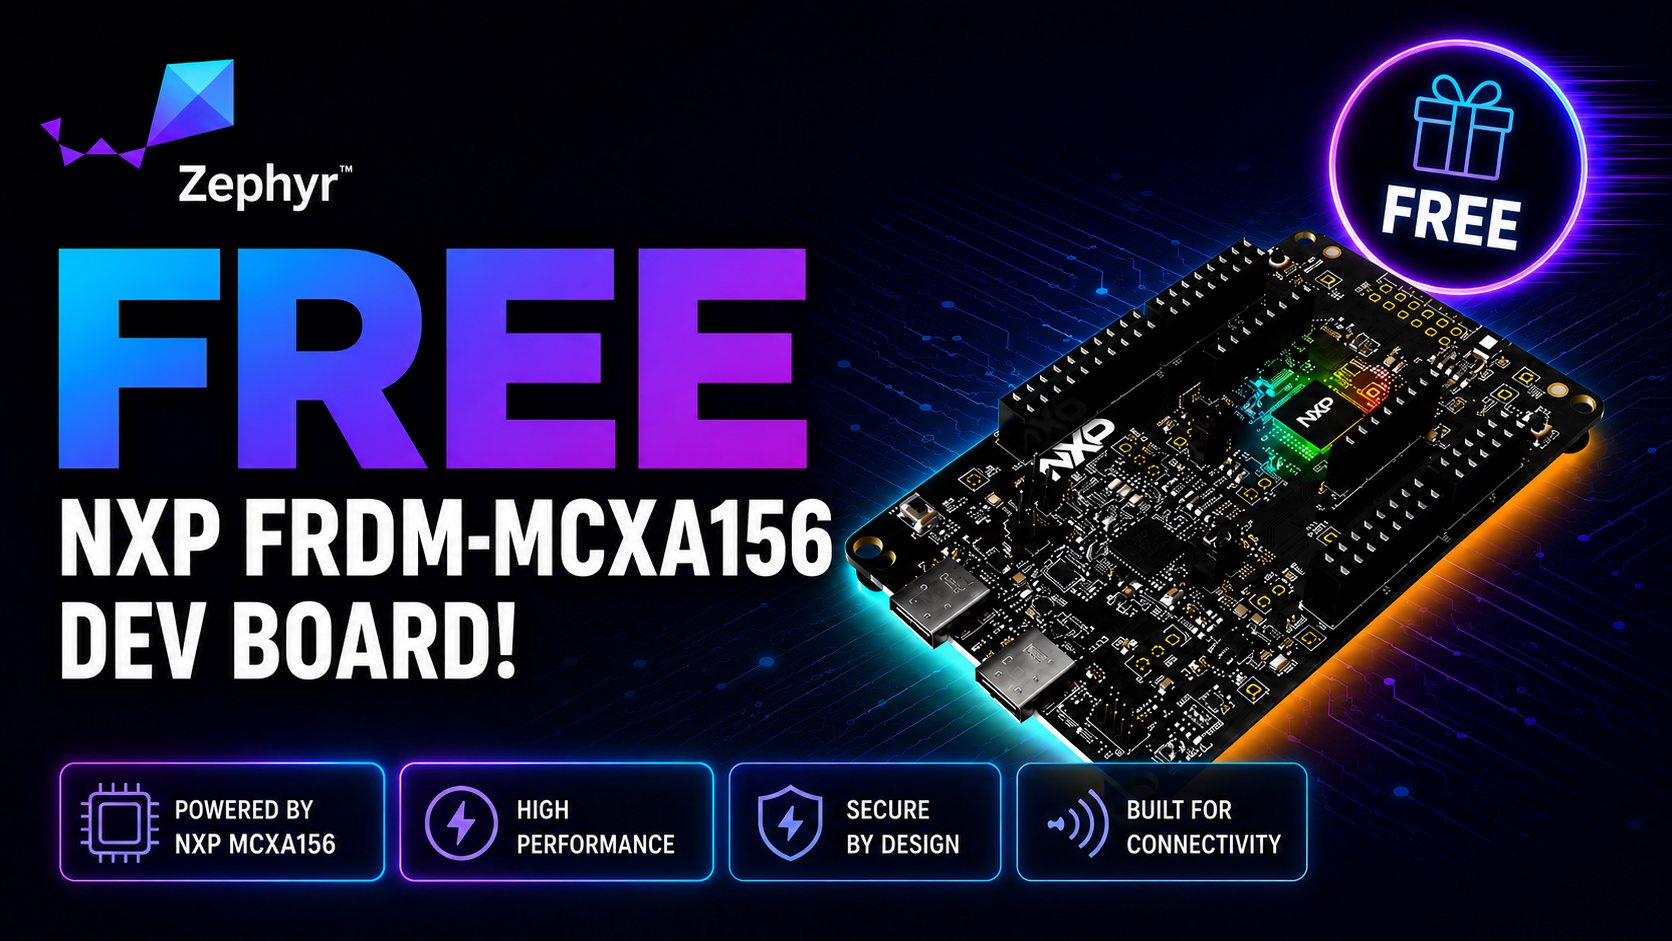
Free for Zephyr Developers
Get a Free NXP FRDM-MCXA156 Dev Board
NXP is offering 500 free FRDM-MCXA156 boards to embedded developers exploring Zephyr. Limited to 500 boards or available through December 31, 2026, whichever comes first.
Claim Your Free Board →Installing Zephyr using NXPs MCUXpresso for VS Code Extension
Zephyr RTOS currently supports over 800 different development boards! That’s a lot! In this series, I will show you how to work with Zephyr on the NXP FRDM-MCXN947 development board.
There are multiple ways that you can go about installing Zephyr. First, you can follow the Zephyr documentation and install it directly using the west tools as explained in the Zephyr Getting Started Guide.
Alternatively, you can use Visual Studio Code if you want to work in an IDE where your text editor and build tools are integrated. I’d recommend that you head over to the extensions tab and install MCUXpresso for VS Code as shown in the image below:

Once installed, it will appear as an X in your VS Code sidebar. Click the X and then in the Quickstart Panel find the option to “Open MCUXpresso Installer”. The installer will allow you to install a variety of tools like debuggers, SDKs, and perhaps most importantly, Zephyr!
Click the installer as shown below:

In the lower right side of VS Code, you should see a window pop-up giving you the option to download the installer. Click download. It will take a few seconds, but once downloaded, the installer window will open as shown below:

You can see above the settings I have installed to work with Zephyr using the FRDM-MCXN947 development board.
Once you’ve selected the desired settings, click the install button.
Importing and Compiling a Zephyr Blinky Application
Once you’ve installed the Zephyr RTOS toolchain, you’ll want to head back to Visual Studio Code and the MCUXpresso extension. You’ll notice that the QuickStart Panel as an option to Import and Example from Repository. Click that option.
You’ll find that you now have the option to configure the project you want to import. For a first project, I recommend the following settings:
- Set the board to NXP FRDM-MCXN947 (CPU0). The 947 is dual core, so CPU0 will use the first core.
- Set the template to the basic blinky example. Zephyr comes with many examples. I highly recommend checking them out, but start first with a blinky.
- Name your application. I chose HelloBlinky for mine.
Overall, your settings should look something like the following:

Now, click import to create the new project in your workspace.
Understanding a Zephyr RTOS Project
When you first open a Zephyr RTOS project, the directory structure can feel overwhelming. There are dozens of folders, each filled with source files, drivers, board definitions, and more. But once you know where to look, the structure actually tells a clear story about how Zephyr is organized and how you, as a developer, should navigate it.
As shown in the image below, Zephyr breaks its source tree into a handful of high-level categories:

As you can see Zephyr is organized into several folders which are important for the developer to understand like:
- bootloader, modules, tools, zephyr
These are the top-level directories:
- The bootloader includes mcuboot;
- modules holds external libraries like FATFS;
- tools includes network tools and scripts;
- and zephyr contains the RTOS source itself.
- arch, boards, soc
Within zephyr/, these folders define CPUs, development boards, and SoCs. This is where the hardware-specific glue code lives.
- drivers, dts
Device drivers and device trees are separated but work hand-in-hand. Drivers provide the implementations while DTS provides the configuration layer.
- kernel, include, subsys
The heart of Zephyr. This is the kernel source, public headers, and subsystems (networking, power management, etc.).
- samples, tests
If you’re learning or validating a feature, these are your go-to directories. Samples provide working examples, and tests contain regression and validation suites.
- scripts, cmake, misc
Build and automation infrastructure that ties everything together.
In other words, Zephyr is intentionally modular. Hardware-specific details live in boards and soc, system logic lives in kernel and subsys, and everything is held together by the build system (cmake and scripts). The result is an RTOS that is both portable and scalable—whether you’re targeting a small Cortex-M board or a multi-core SoC.
I recommend starting in the samples folder for developers new to Zephyr. Build and run a few demos on your target board, then trace back into drivers, dts, and kernel to see how things connect. Once you understand the directory flow, Zephyr stops feeling like “overkill” and starts revealing why its structure is so powerful: it enforces good separation of concerns, scalability, and reusability right from the project layout.
Let’s take a look at a simple blinky project and how it can be deployed using the NXP MCUXpresso for VS Code extension and then how to do it using west.
Compiling and Deploying a Zephyr RTOS Project with West
Zephyr projects are built and managed with the west tool—a command-line utility that ties together source management, building, and flashing. While many developers use Visual Studio Code with Zephyr, you’re not locked into the IDE. In fact, one of the best ways to ensure your workspace is properly set up is to open a terminal inside VS Code and run the west commands directly. This gives you the flexibility to switch between the command line and integrated IDE tools without losing consistency.
As shown in the image below, the west build command has a few key parts:

The command might look complicated, but it’s straightforward. It includes the following:
- west – Invokes the west tool.
- build – The build command itself.
- -p – Performs a pristine build, clearing out any old artifacts before compiling.
- -b <board> – Specifies the target board. In this case, frdm_mcxn947/mcxn947/cpu0.
- <path-to-sample> – Points to the example you want to build. Here, zephyr/samples/basic/blinky.
Putting it all together, the command looks like this:
west build -p -b frdm_mcxn947/mcxn947/cpu0 zephyr/samples/basic/blinkyThis tells Zephyr to compile the blinky sample for the FRDM-MCXN947 board, ensuring the build is clean and reproducible. Once the build completes, you can flash the binary to your board using:
west flashThe beauty of this workflow is that it scales seamlessly. You can experiment with different samples, switch boards, or rerun pristine builds with a single line of code. And because it runs right inside your IDE’s terminal, you never have to choose between a command-line purist workflow and the convenience of integrated debugging tools. With west, you get the best of both worlds.
Compiling and Deploying a Zephyr RTOS Project with VS Code
While working with Zephyr at the command line is great, sometimes you just want to make life easier and use the integrated development tools.
From within the MCUXpresso for VS Code Extension, the X on the tool panel, you’ll see the following for your project:

The first icon next to HelloBlinky is the compile button. When you click it, your application will be compiled into a binary that can be deployed to the target. For example, when I click the button, I get the following output:

Note: Your values may be slightly different due to some changes that I’ve made to my default blinky application that we’ll discuss in future posts.
To deploy the application, all you need to do is click the play button next to the compile button. Alternatively, you can click the debug application in the application palette and then click run from the top menu as shown below:

From here, your application will be deployed to the target and you can run a debug session just like in any other IDE!
Your Next Steps
At this point, you’ve seen why Zephyr RTOS may feel like overkill at first—but also why its structure, tooling, and ecosystem make it a powerful choice for professional embedded development. Now it’s time to take action.
Here are three practical next steps you can take today:
- Use the steps from this post to install Zephyr using NXP’s MCUXpresso for VS Code plug-in.
- Run your first build. Open a terminal (inside VS Code or standalone) and use the west build command to compile the Blinky example for your board. Seeing that LED blink is the first milestone on your Zephyr journey.
- Build and deploy the Blinky application from within VS Code. Use the compile and debug buttons to compile and deploy to your target. Experiment with the debug features to see that it’s just like any other IDE.
In the next post, How to Configure Zephyr RTOS: A Practical Guide to West, Kconfig, proj.conf, we’ll examine how Zephyr’s configuration system works and how you can control your project setup.
👉 Don’t miss the rest of this series. Sign up for my Embedded Bytes newsletter to get the latest posts, insights, and hands-on tips delivered straight to your inbox.
Additional Resources
- Blog – Introduction to the NXP MCX N FRDM Board
- Free Training – Getting Started with MCUXpresso for Visual Studio Code
- Free Webinar – Getting Started with the MCUXpresso SDK for NXP MCUs
Struggling to keep your development skills up to date or facing outdated processes that slow down your team, raise costs, and impact product quality?
Here are 4 ways I can help you:
- Embedded Software Academy: Enhance your skills, streamline your processes, and elevate your architecture. Join my academy for on-demand, hands-on workshops and cutting-edge development resources designed to transform your career and keep you ahead of the curve.
- Consulting Services: Get personalized, expert guidance to streamline your development processes, boost efficiency, and achieve your project goals faster. Partner with us to unlock your team's full potential and drive innovation, ensuring your projects success.
- Team Training and Development: Empower your team with the latest best practices in embedded software. Our expert-led training sessions will equip your team with the skills and knowledge to excel, innovate, and drive your projects to success.
- Customized Design Solutions: Get design and development assistance to enhance efficiency, ensure robust testing, and streamline your development pipeline, driving your projects success.
Take action today to upgrade your skills, optimize your team, and achieve success.