Getting Started with the New MCUXpresso SDK for NXP MCUs
Most embedded SDKs are bloated, tied to heavyweight IDEs, and challenging to integrate into modern development workflows. Simple things like CI/CD pipeline integration often become frustrating workarounds rather than clean solutions. Developers working with microcontrollers have felt these limitations for years. NXP’s new MCUXpresso SDK aims to fix that.
The MCUXpresso SDK is built around modern tools like west, CMake, Ninja, and Python. While it works with NXPs MCUXpresso IDE, it was designed for use with NXP’s MCUXpresso extension for Visual Studio Code. What has intrigued me the most about the SDK is that it supports reproducible builds, scalable project structures, and modern development practices right out of the box.
In this post, I’ll walk through how to set it up, explore the updated development flow, and get a basic project building and running quickly. We’ll create a custom SDK for the MCX N. By the end of this post, you’ll even build and deploy a hello world application from your custom SDK.
What is the MCUXpresso SDK?
The MCUXpresso SDK is a comprehensive software enablement package that simplifies and accelerates application development with Arm® Cortex®-M-based devices from NXP.
When the MCX N947 was released about a year ago, I wanted to create a CI/CD workflow that leveraged Docker for use with some of the courses I taught and for clients. However, very quickly, I was frustrated!
There wasn’t a simple workflow to get the parts of the SDK I needed. Instead, I had to bring the entire SDK in with all targets and examples or go through an unwieldy process to break it up. I ended up abandoning the project because it was like trying to put a square block in a round hole. (Sure, they did it for Apollo 13, but I didn’t need that kind of pressure.)
NXP wasn’t blind, though, to the challenges faced by developers. The new MCUXpresso SDK was split into several separate project repos. The separation was inspired by Zephyr, a highly configurable RTOS platform. So now there are repos for:
- Each device
- RTOSes
- Middleware
- Etc
Now, as developers, several problems have been solved for us that were very challenging like:
- Avoiding a vast, single-repository solution
- Flexibility to select needed families and examples for specific projects
- Fetching specific project versions
With the changes to the MCUXpresso SDK, you can now manage the source code much easier and build solutions that are better integrated with modern software development workflows.
Using west to Manage the MCUXpresso SDK
One of the core improvements in the MCUXpresso SDK is the use of west as the project and dependency management tool. Originally developed for the Zephyr RTOS, west provides a clean way to manage multiple Git repositories from a single manifest. This is especially useful in the MCUXpresso SDK, which splits components like family support, middleware, RTOS integration, and example applications into separate repositories.
With west, the SDK isn’t a monolithic code drop. Instead, you define what parts you need in a manifest file, and west handles fetching the appropriate versions of each repository. This makes it much easier to pull in only the components relevant to your project and to manage updates in a controlled, repeatable way.
For example, to get started, you clone the manifest repository and run:
west init -m https://github.com/nxp-MCUXpresso/MCUXpressosdk-manifests.git

west updateThe west init command sets up the workspace and points to the manifest file. The west update command then walks through the manifest and pulls in each of the required repositories into the correct folder structure.
This gives you a reproducible, source-controlled setup that integrates naturally into version control systems and CI/CD pipelines. It also decouples your project from IDE-specific settings and lets you work with editors and tools of your choice.
In short, west is what finally makes the MCUXpresso SDK scalable and modern. You can start small with just your target board and a few example applications, and incrementally add other components—without dragging along the entire kitchen sink.
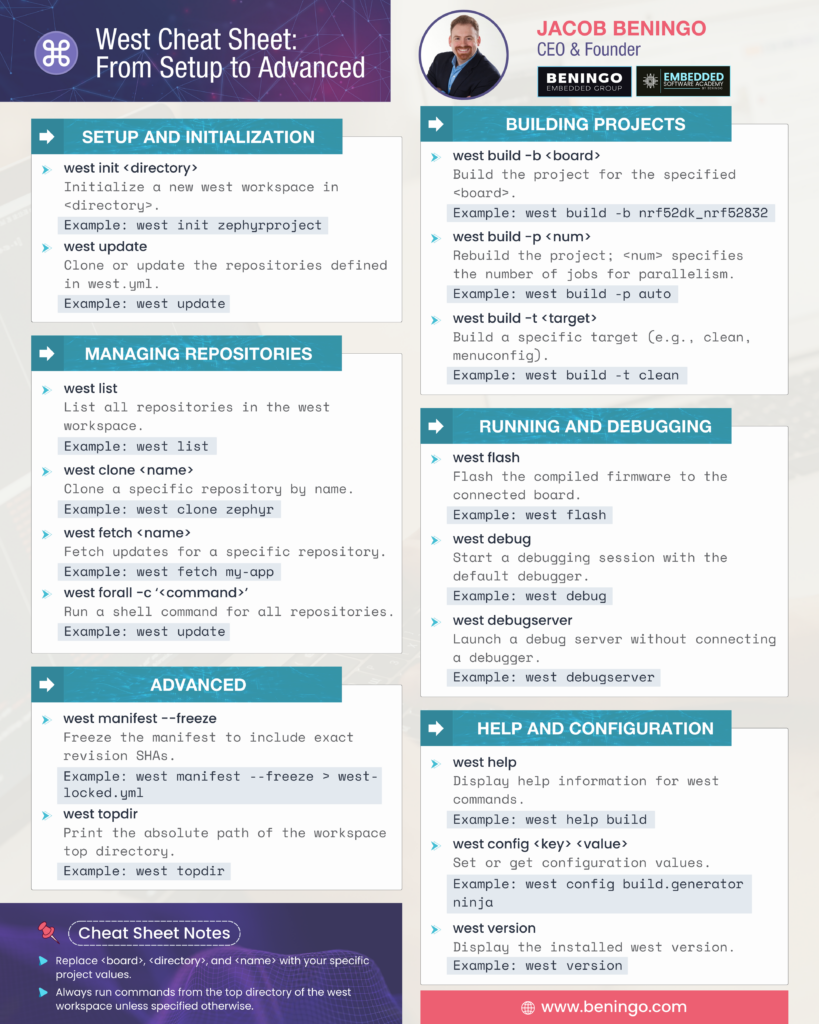
Note: If you are new to west, here is my west cheat sheet that you can use as a reference.
Installing the MCUXpresso MCX N SDK Dependencies with MCUXpresso Installer
One pain point with many embedded SDKs is managing the dependencies needed to build, flash, and debug applications. Traditionally, this has involved hunting down tools like CMake, Ninja, the GNU Arm toolchain, and compatible debug server software, then wiring them all together manually.
The MCUXpresso for VS Code extension streamlines this process by integrating a graphical MCUXpresso Installer that pulls in everything you need in one step. Here’s a simple process you can follow to install the dependencies:
Note: You don’t have to use the integrated installer. Instead, you can install everything manually using the instructions located here. (Why? Think Docker containers . . . ).
- Install and then open Visual Studio Code
- Install MCUXpresso for VS Code from the extensions menu

- In the MCUXpresso Extension, the X icon, find the Open MCUXpresso Installer and double click on it

- In the lower right, you’ll be prompted to download the installer
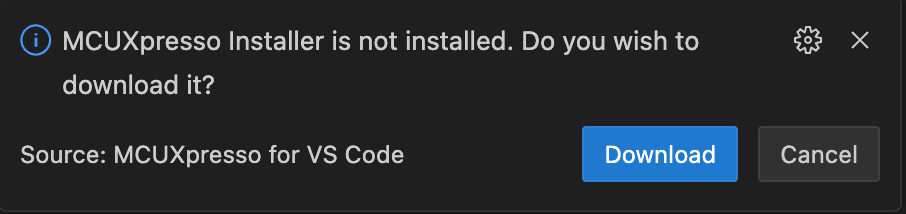
- Once the installer is downloaded, a new window will open up like the following:

- You’ll want to install the MCUXpresso SDK Developer. This is all the tools necessary to work with the new MCUXpresso SDK. (And any NXP SDK for that matter).
Just click the MCUXpresso SDK Developer along with any other software packages you want and then click install. - Once everything is installed, just close the installer.
Under the hood, the installer fetches the required tools using Homebrew on macOS and other native package managers on Windows and Linux. It also ensures that paths and environment variables are correctly set in your development shell or VS Code terminal.
This eliminates a lot of the guesswork involved in setting up the toolchain. More importantly, it brings consistency across environments—especially valuable when sharing a setup with teammates or replicating it inside CI containers.
(In a future post, I’ll show you how to build a docker container with all of these steps so that you can share the image and ensure consistency!).
Once installed, you can verify the tools by launching a new terminal from within VS Code and checking versions with commands like west --version, cmake --version, and arm-none-eabi-gcc --version.
Note: On macOS, you’ll have to install west globally using homebrew.
Remember, you now have the tools you need for the MCUXpresso SDK. We now have to install and configure the MCUXpresso SDK.
Cloning and Initializing the MCUXpresso SDK with west
Once you’ve installed the dependencies, you’re ready to jump in and get the SDK. We’re going to start by looking at how you would get the entire NXP SDK that includes everything they have to offer.
First, open a terminal in the location where you want to put the SDK.
Next, run the following command in the terminal:
west init -m https://github.com/nxp-MCUXpresso/MCUXpressosdk-manifests/ MCUXpresso-sdkThis initializes the workspace using the manifest repository from NXP. At this point, you don’t yet have the actual SDK code—only the manifest files, which describe the structure of the full SDK and where to fetch its components from.
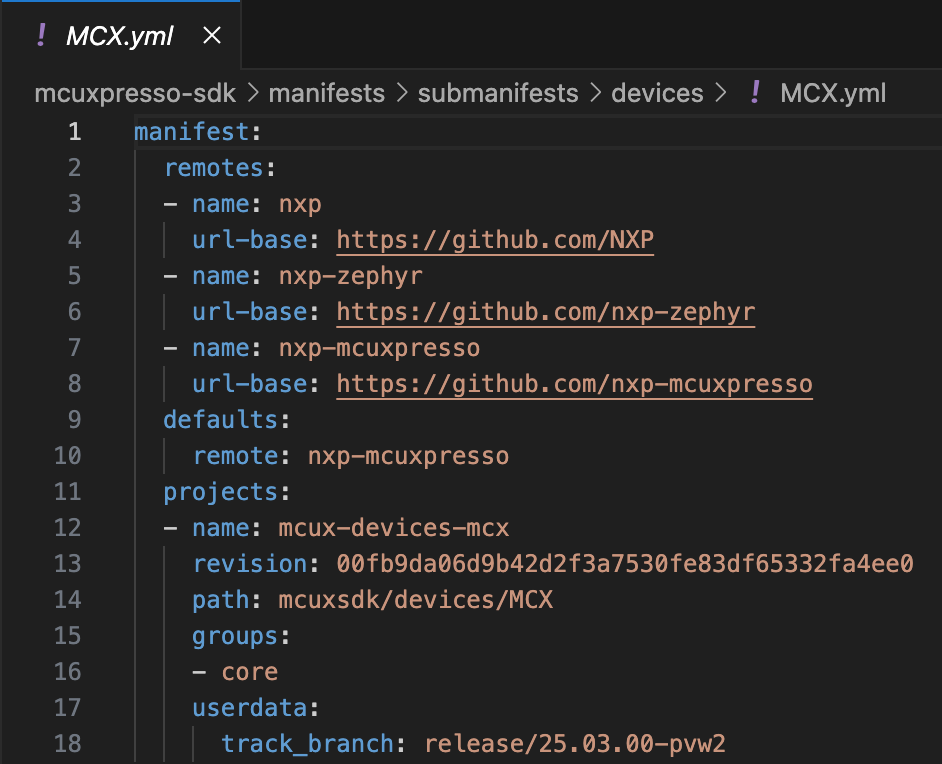
Inside the manifests/ directory, you’ll find sub-manifest files like MCX.yml that define which repositories are included for a given device family or configuration. For example, MCX.yml includes a list of Git repositories for board support, middleware, RTOS components, and example applications specifically targeting the MCX portfolio microcontrollers.
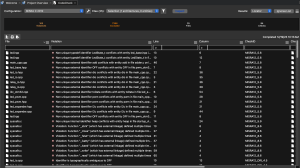
You can see an example of how this looks in the image below:

If I look inside the MCX.yml file, you’ll see that there are several different repos that can be pulled from to get the MCUXpresso SDK:
To fetch the source code described in the manifest, run:
west updateThis will clone each of the repositories specified in the selected manifest file into your workspace. You’ll end up with a structured SDK directory that’s ready to build and customize, without needing to manually hunt for packages or copy and paste SDK folders.
One of the best parts of this setup is how cleanly it integrates into version control. The manifest pinpoints exact revisions of each repo, so your entire team (or CI system) can clone the same sources and get identical results.
Now, you might be thinking, “This is great but it still pulled in the entire SDK”. Let’s now look at how you can modify your set up to pull only the SDK pieces for the MCUXpresso MCX N.
Cloning and Initializing the MCX N SDK with west
Start in a project directory. I’m going to use nxp-test.
In a terminal, run the clone command again using west:
west init -m https://github.com/nxp-MCUXpresso/MCUXpressosdk-manifests/ MCUXpresso-sdkNow, if I only want to the MCX family, I can navigate to my manifests/submanifests/devices directory. It contains:
- DSC.yml
- i.MX.yml
- Kinetis.yml
- LPC.yml
- MCX.yml
- RT.yml
- Wireless.yml
I’m going to delete every *.yml and only leave MCX.yml.
If I wanted to, I could now also review the other manifests like middleware, rtos, etc. I could even add an application folder and include manifests for my own application code.
Once I’ve made any changes I’d like, I can pull the code using:
west updateYou now have modified west scripts and the SDK to only pull the pieces of the SDK that you need to use in your project. I would take these modified scripts and put them in my own project repo that could then be cloned with west for other members to set up the SDK.
Next, we’ll walk through how to import and build an example project using the MCUXpresso for VS Code extension.
Importing and Building an Example Project
Now that you have a customized manifest and SDK, you probably would like to run some of the examples. There are a few steps that can be executed to get an example up and running in Visual Studio Code. You could also just directly use west as well. For example, if I want to run hello world:
west build -b frdmmcxn947 -Dcore_id = cm33_core0

west flash -r linkserver

west debug -r linkserverHowever, since Visual Studio Code is so popular and useful, we’ll look at how we can import our MCX N SDK, import a project, build and deploy it.
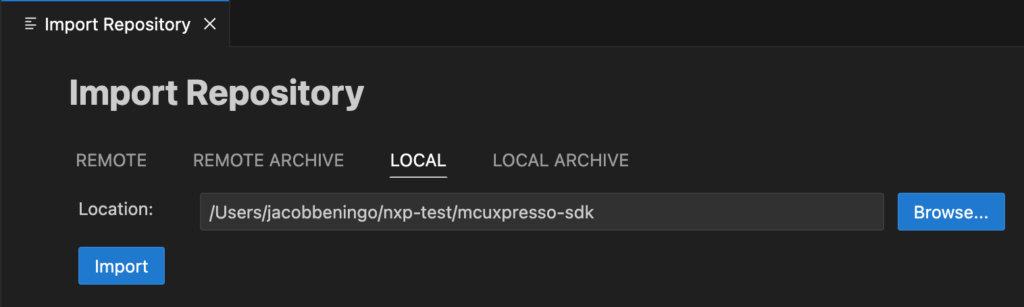
In Visual Studo Code, click on the MCUXpresso extension and the Import Repository. There are several options to choose from. Click on Local and then browse to your MCX N SDK folder. For example, my import looked something like the following:
Once I click import, you’ll notice that under the Imported Repositories tab, that your new repo has been added:

Now from the MCUXpresso Quickstart Panel, click “Import Example from Repository”. Make sure that you follow these steps to select the right values from each dropdown:
1) Select the repository you just added
2) Select the latest Arm GNU Toolchain
3) Select the FRDM-MCXN947 development board
4) Select the demo application, template, as demo_apps/hellow_world_cm33_core0
5) Click Import
You might need to let Visual Studio Code know that you trust the author. After that though the project will import into your workspace. From the MCUXpresso extensions project section, you can click the compile button to compile the project:
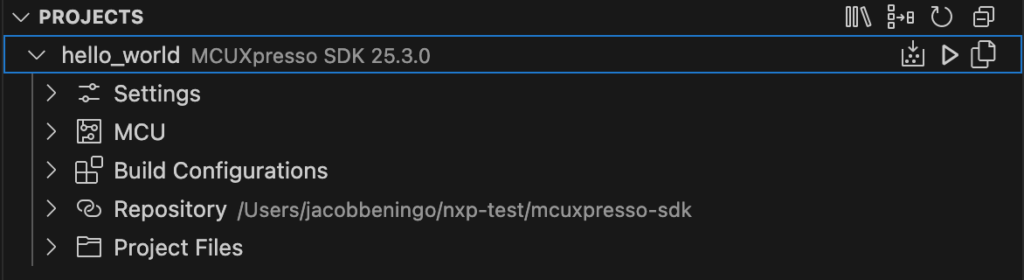
You can then click the play button next to the compile button to deploy the application!
If you followed along, then congratulations! You just used the new NXP MCUXpresso SDK! In fact, you customized it by adjusting your west manifests and then imported them into Visual Studio Code!
Closing Thoughts and Next Steps
The move to the west-based MCUXpresso SDK is a significant improvement over previous SDKs. It simplifies dependency management, supports clean version control, and most importantly, it easier to integrate with modern tooling and workflows.
For real-world projects, one of the next logical steps is to set up a Docker container that encapsulates the toolchain and dependencies. This allows you to build your firmware in a clean, consistent environment, regardless of the host system. You can mount your SDK workspace into the container and run west build commands just as you would locally.
From there, it becomes straightforward to connect the SDK to your CI/CD system. For example:
- Run containerized builds on every push or pull request.
- Use west update to fetch exact SDK versions.
- Run automated unit or integration tests on hardware or in simulation.
- Archive firmware artifacts for deployment or release validation.
If you’ve been held back by tooling in the past, the MCUXpresso SDK finally brings a structure and workflow that’s compatible with how modern embedded systems are built.
Until next time, happy coding!
Other MCUXpresso Articles you might like:
- Visual Studio Code: A Guide to the MCUXpresso for VS Code extension
- Streamline Your Development: Integrating NXP MCUXpresso SDK with Docker
- Accelerating Development using NXP MCX Microcontrollers
- Introduction to the NXP MCX N FRDM Board
- Accelerating Embedded Software Development with NXP’s Application Code Hub
Struggling to keep your development skills up to date or facing outdated processes that slow down your team, raise costs, and impact product quality?
Here are 4 ways I can help you:
- Embedded Software Academy: Enhance your skills, streamline your processes, and elevate your architecture. Join my academy for on-demand, hands-on workshops and cutting-edge development resources designed to transform your career and keep you ahead of the curve.
- Consulting Services: Get personalized, expert guidance to streamline your development processes, boost efficiency, and achieve your project goals faster. Partner with us to unlock your team's full potential and drive innovation, ensuring your projects success.
- Team Training and Development: Empower your team with the latest best practices in embedded software. Our expert-led training sessions will equip your team with the skills and knowledge to excel, innovate, and drive your projects to success.
- Customized Design Solutions: Get design and development assistance to enhance efficiency, ensure robust testing, and streamline your development pipeline, driving your projects success.
Take action today to upgrade your skills, optimize your team, and achieve success.