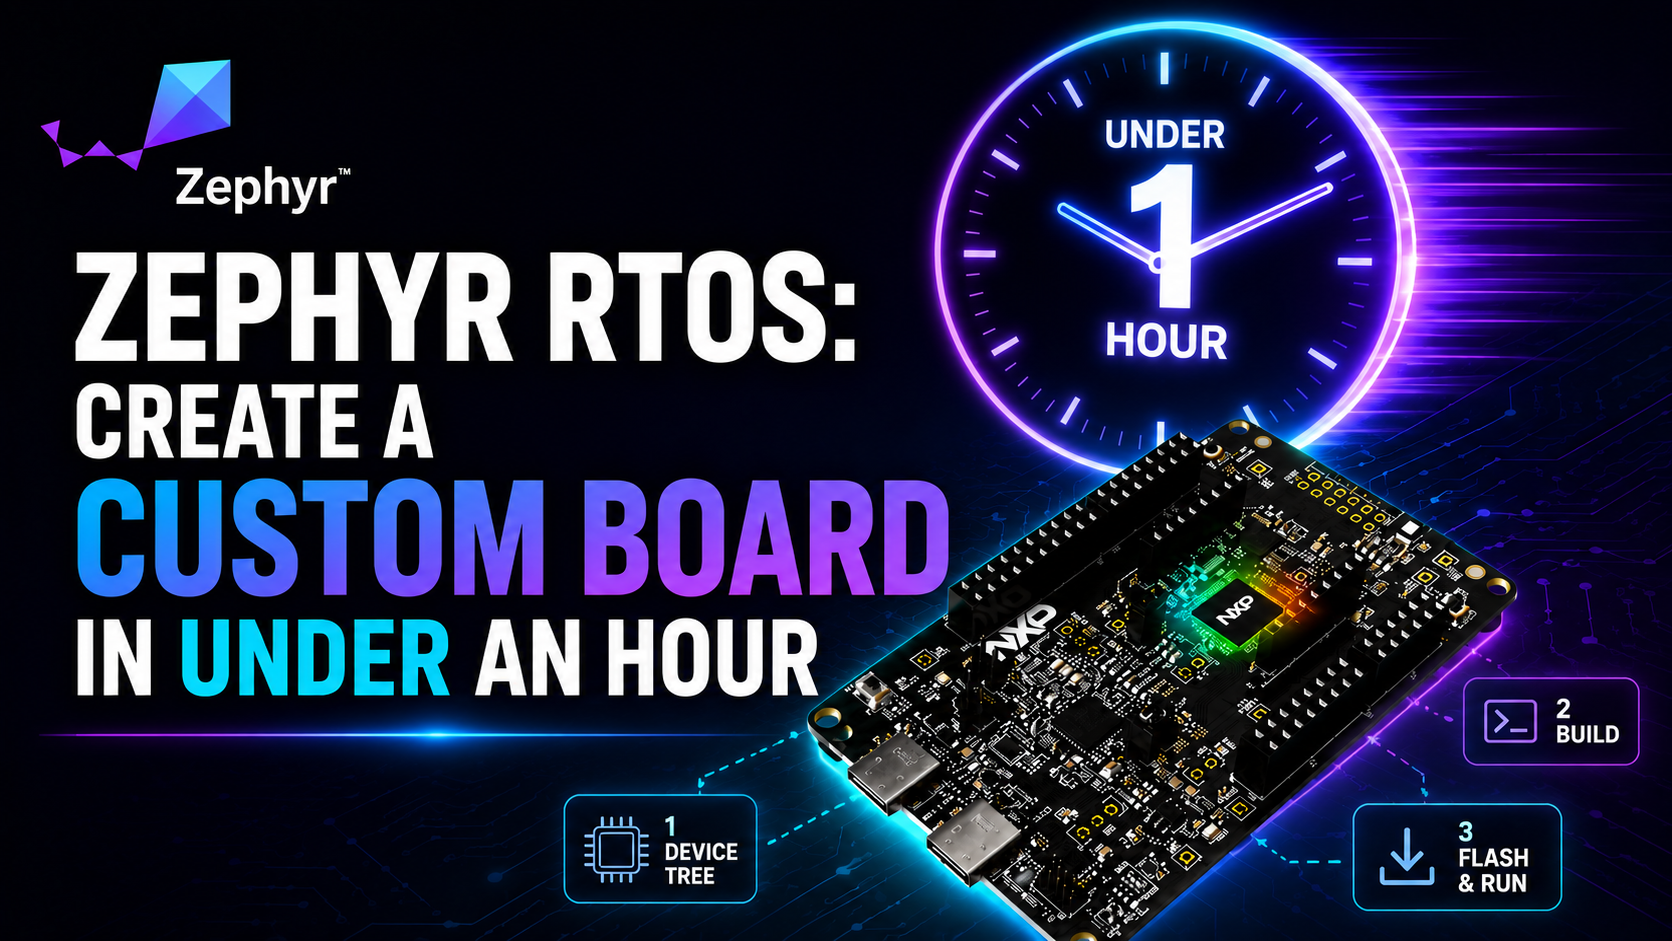
Zephyr Custom Board: Create One in Under an Hour
Creating a Zephyr custom board from scratch feels like a wall you’d rather not climb. So, you don’t. You grab an existing board, place an overlay on top, and get the behavior you need. For prototyping, that’s exactly right.
Then the product gets real. Multiple SKUs, custom hardware, variants that don’t map cleanly onto anyone else’s dev board. The overlay stack that carried you through bring-up starts fighting you, and “just use an existing board” quietly stops being the answer.
So, you open a real board definition to see what it takes, and it looks complicated! A directory full of files with cryptic names, a Devicetree referencing things you didn’t write, and a build system that throws “Board not found” the moment you try to replicate it.
You might think creating your own Zephyr custom board file is impossible, but I promise you, it’s far less complicated than it seems.
In this post, I’ll walk you through:
- What each file in a Zephyr custom board definition does, and which ones you actually need
- How to build a Zephyr custom board by hand from an in-tree reference
- How to collapse that work from an hour to a few minutes using an AI skill
Let’s dig in!
A Zephyr Custom Board is Just a Handful of Files
Open any board in the Zephyr tree, and the file list looks busy! For example, check out the board files for the frdm_mcxa156 below:
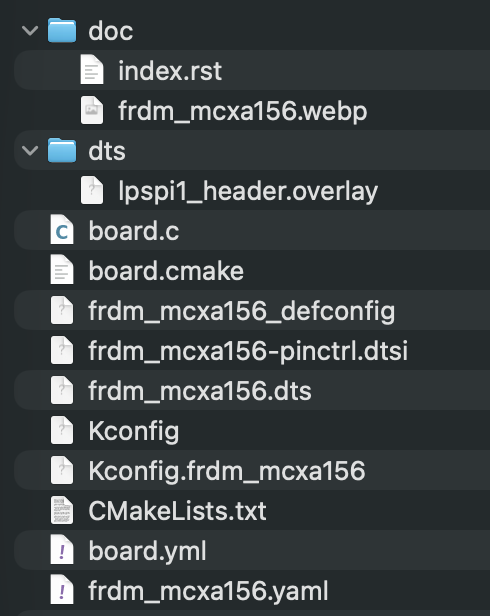
The board folder looks complicated, but I promise you this is far simpler than it appears. In fact, most of the files in the frdm_mcxa156 board directory are optional! The structure itself isn’t arbitrary but follows the Hardware Model v2 (HWMv2) board porting guide.
The HWMv2 layout has been used by Zephyr since 3.7.0. It replaced an older version, which is now fully deprecated and not supported. The HWMv2 guide spells out exactly which files a Zephyr custom board can have and what each one does. The good news is that you can learn the model once, and every board in the tree is the same way.
Let’s look at the minimum you need to get a board working.
First, you need a board.yml file that acts like the board’s identity card. It declares the board name, the vendor, and the SoC it’s built around, along with any variants. The build system reads this first to learn that your board exists and what it’s made of. For example, check out the frdm_mcxa156.yaml file in Figure 2.
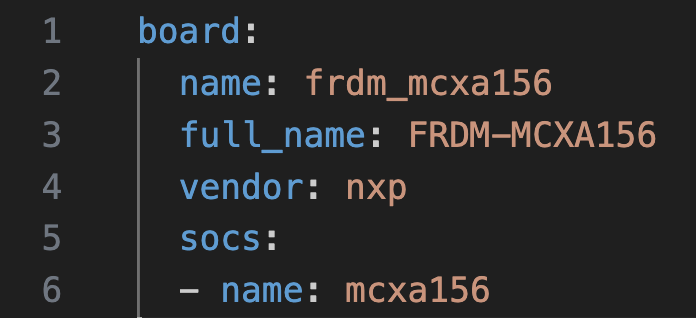
There’s something really important to understand about board.yml: no board.yml, no board! This is the file the old model lacked, which is why HWMv1 tutorials fail with “Board not found” if you try to run them today.
Next, <board>_<qualifiers>.dts is the hardware description. This is the Devicetree that tells Zephyr what’s physically on the board: which SoC, which pins go to the LEDs and buttons, which peripherals are wired up, and where.
I highly encourage you to read through the frdm_mcxa156.dts file. You’ll discover that it references other .dtsi and header files along with defining how everything is wired up. The file is too large to share with you in text form here, but you can read it on Github here.
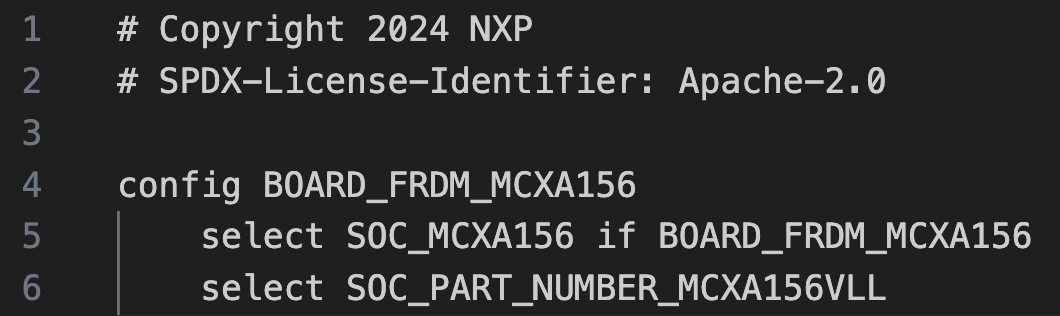
Finally, Kconfig.<board> selects the SoC in the Kconfig tree. That’s its whole job. It must not select anything outside the reusable board and SoC Kconfig trees. Keep it narrow, and it stays maintainable. For example, here is the Kconfig.frdm_mcxa156:
Those three get you a board that the build system recognizes and can compile an application on. Everything else exists to make the Zephyr custom board more capable, more correct, or contributable upstream. Here’s a quick definition of what the remaining files do:
<board>_<qualifiers>_defconfigis a Kconfig fragment merged as-is into every build for the board. This is where UART, console, GPIO, and serial are enabled, so a fresh build boots to something useful.Kconfig.defconfigsets board-specific default values for Kconfig options that already exist in Zephyr. It’s wrapped in anif BOARD_<NAME> / endifblock. Not every board needs one.Kconfigholds board-specific settings with their own prompts, sourced byboards/Kconfig. It’s distinct fromKconfig.<board>. Drop it if it’s empty.board.cmakewires up the flash and debug runners (jlink, pyocd, linkserver, and the like).<board>-pinctrl.dtsiis the pin mux, included from the .dts.CMakeLists.txtis only needed if you’re adding board-level source files to the build.doc/index.rst+doc/<board>.webpare only needed if you’re contributing the board upstream. So, for most product teams, you don’t need it!<board>_<qualifiers>.yamlis Twister test metadata, for running the test suite against your board.
Three mandatory files, the rest acting as supporting actors. Once you see a definition this way, getting your own Zephyr custom board file off the ground is much simpler and far less intimidating.
Free for Zephyr Developers
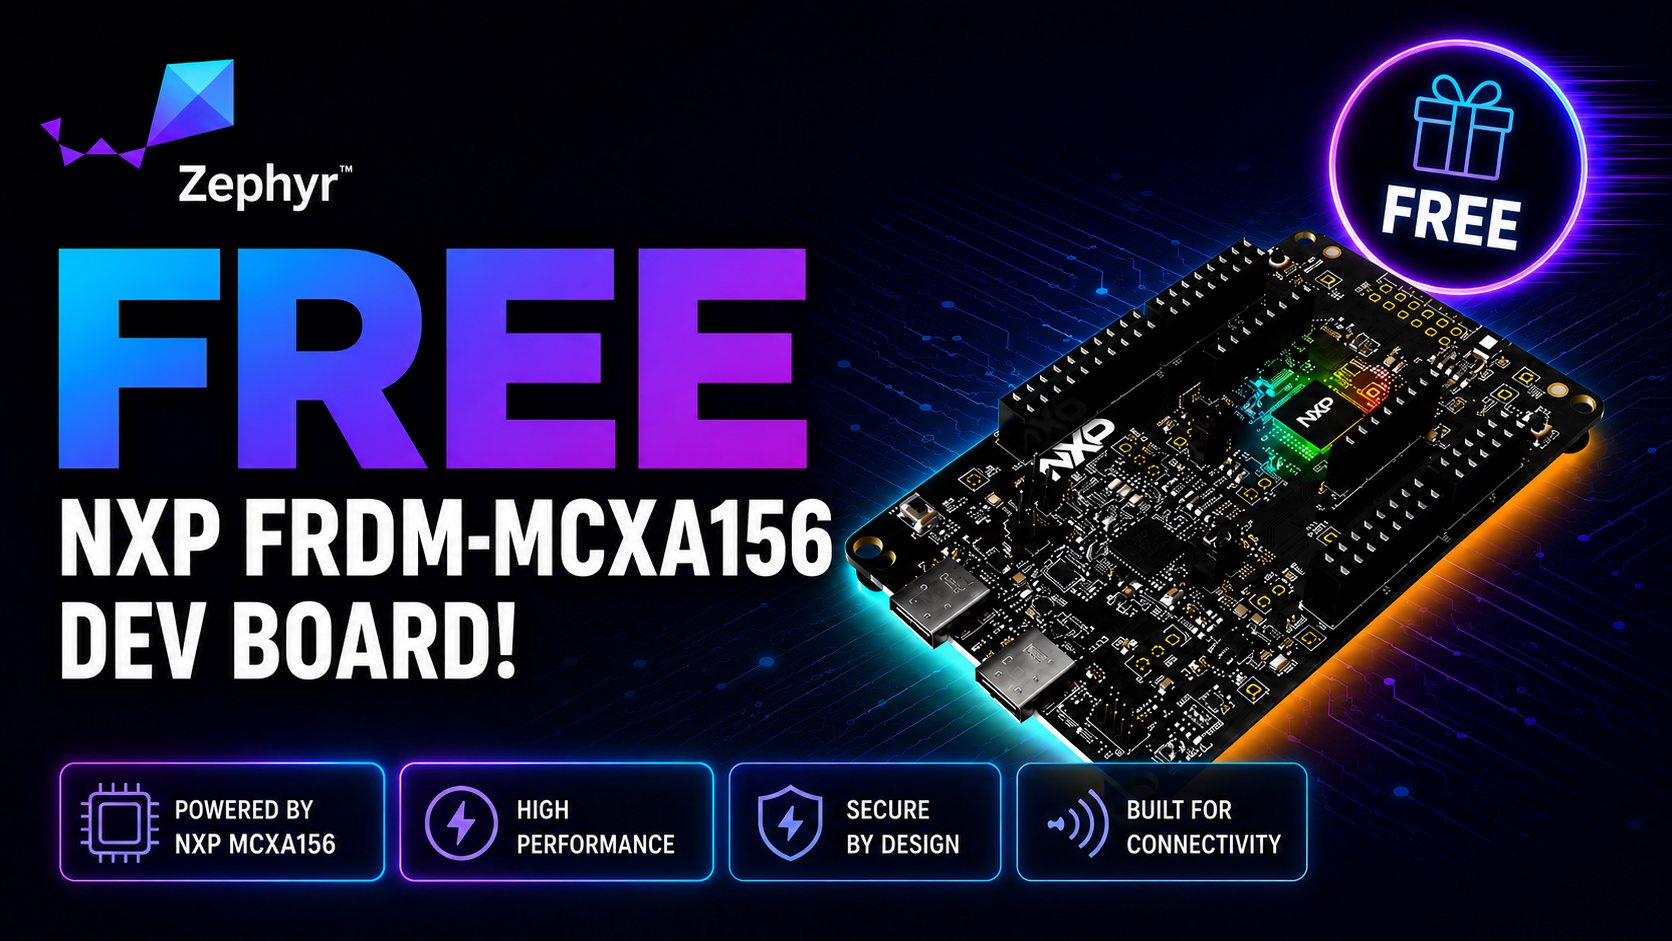
Get a Free NXP FRDM-MCXA156 Dev Board
NXP is offering 500 free FRDM-MCXA156 boards to embedded developers exploring Zephyr. Limited to 500 boards or available through December 31, 2026, whichever comes first.
Claim Your Free Board →Building a Zephyr Custom Board by Hand
The fastest way to learn the layout is to build one. And the fastest way to build one is to start from a board that already works, rather than from an empty directory.
Pick a reference board that’s close to your target. The same SoC family is ideal; the same vendor is good enough. For a Zephyr custom board built around the MCXA156, the in-tree frdm_mcxa156 is the obvious starting point. Copy its directory into your own boards folder, whether that’s in-tree under boards/<vendor>/ or, better for a product, out-of-tree in your application repo. You can do this using the following command:
cp -r zephyr/boards/nxp/frdm_mcxa156 my-app/boards/my_boardNow, you work through the board files in order. Each one has the single job we already discussed, so this is mechanical, not mysterious.
Start with board.yml. Change the board name, the full name, and the vendor to match your hardware. Leave the SoC as mcxa156 if you’re using the same part. This is the file that makes the build system see your board, so renaming it correctly here matters more than anywhere else.
Next, rename the files that contain the board name. The .dts, the Kconfig.<board>, the _defconfig, the pinctrl .dtsi, and the Twister .yaml all need to match your new board name. A board named my_board expects my_board.dts, Kconfig.my_board, and so on. Get one wrong, and the build system silently ignores it, which produces some of the most frustrating errors in Zephyr because nothing is technically broken!
Open Kconfig.my_board and update the config symbol. The BOARD_FRDM_MCXA156 becomes BOARD_MY_BOARD. Leave the SoC selection alone if the part is unchanged. Keep this file narrow, exactly as the reference does.
Then comes the real work: the .dts. This is where your board stops being a copy and becomes its own thing. Strip out the peripherals your hardware doesn’t have. Add the ones it does. Fix the pin assignments so the LEDs, buttons, and connectors point at the pins you actually routed. Update the chosen node so the console lands on the UART you wired. The reference gives you a working skeleton; your schematic tells you what to change. (Spoiler Alert: Next time, I’ll show you how to make this process super simple!)
Finally, prune what you don’t need. Drop the doc/ folder unless you’re contributing upstream. Drop Kconfig.defconfig if you have no defaults to override. Trim the _defconfig to the peripherals you’re enabling. The goal is a Zephyr custom board definition that describes your board and nothing else.
Once you’re at this point, you’re ready to build it. If the names line up and the devicetree is sound, you’ll get a board the toolchain recognizes! Here’s how you can test it:
west build -b my_board samples/hello_worldThat’s the whole loop. Copy, rename, strip, fix, build. The first time, it takes about an hour because you’re checking every file against the porting guide. The second time it takes twenty minutes. There’s no magic in it, just a checklist applied carefully.
The Naming Trap That Builds Today and Breaks Later
Here’s where careful copying bites back.
Look closely at the reference you started from. The frdm_mcxa156 uses two naming shortcuts that the porting guide explicitly allows but does not recommend:
- The devicetree is named
frdm_mcxa156.dts, notfrdm_mcxa156_mcxa156.dts - The defconfig is named
frdm_mcxa156_defconfig, notfrdm_mcxa156_mcxa156_defconfig
Both drop the SoC qualifier. And both are legal, but only because the MCXA156 is a single-core part with one SoC and no variants. Under those exact conditions, Zephyr lets the unqualified name resolve.
The problem is what happens when those conditions change. Add a second SoC to the board. Add a variant. Spin a new SKU on a slightly different part. The moment a qualifier enters the picture, the unqualified files stop matching, and the build falls back to defaults without telling you. No error. No warning. Just a board that builds clean and behaves wrong.
Contrast this with the frdm_mcxn947, a dual-core part. It had no choice but to use the fully qualified form: frdm_mcxn947_mcxn947_cpu0.dts and frdm_mcxn947_mcxn947_cpu0_defconfig. The multiple cores forced the long names, and as a result that board is immune to the trap from day one.
So, when you copy a single-SoC reference, copy its structure but not its shortcuts. Name your files with the full <board>_<soc> qualifier even when the short form would compile. It costs you nothing today and saves you a silent, six-month-from-now debugging session when your product line grows a second variant.
This is exactly the kind of thing that’s easy to get wrong by hand, and easy to get right with a tool that knows the rules. Which brings us to the faster path.
Creating a Zephyr Custom Board with AI
The manual loop works. It’s also exactly the kind of repetitive, rule-bound, easy-to-fumble task an AI agent handles well. Copy this, rename that, don’t forget the symbol in the third file, watch out for the unqualified name. None of it takes judgment. All of it punishes a slip.
So, I built a Claude Code skill for it: zephyr-bsp-scaffold. You give it a target board name and a reference, and it mirrors the full layered set of board files into a fresh directory, renames the board identifier everywhere it appears, and leaves the silicon untouched. The SoC binding doesn’t change, only the board identity.
What makes it more than a glorified cp is that it encodes the rules you’d otherwise have to carry in your head. Three of them are worth calling out.
First, it finds the correct reference rather than guessing. The skill searches the entire boards/ tree for a definition that natively covers your target SoC, across every vendor namespace, rather than just the brand you typed. It refuses to adapt a near-miss reference onto different silicon, because pin maps, package sizes, and clock trees differ between variants in ways a hello_world smoke build will never catch. No native match, and it stops and tells you rather than handing you a board that looks right and behaves wrong.
Second, it handles the naming trap automatically. The skill detects whether the reference uses the single-variant layout or the multi-qualifier layout and names your files accordingly. This is the trap from the last section, solved. For a multi-qualifier board, it knows the unqualified fallback name doesn’t resolve to your Devicetree at all; Zephyr quietly substitutes a stub and produces an empty resolved DT. The skill won’t let that through.
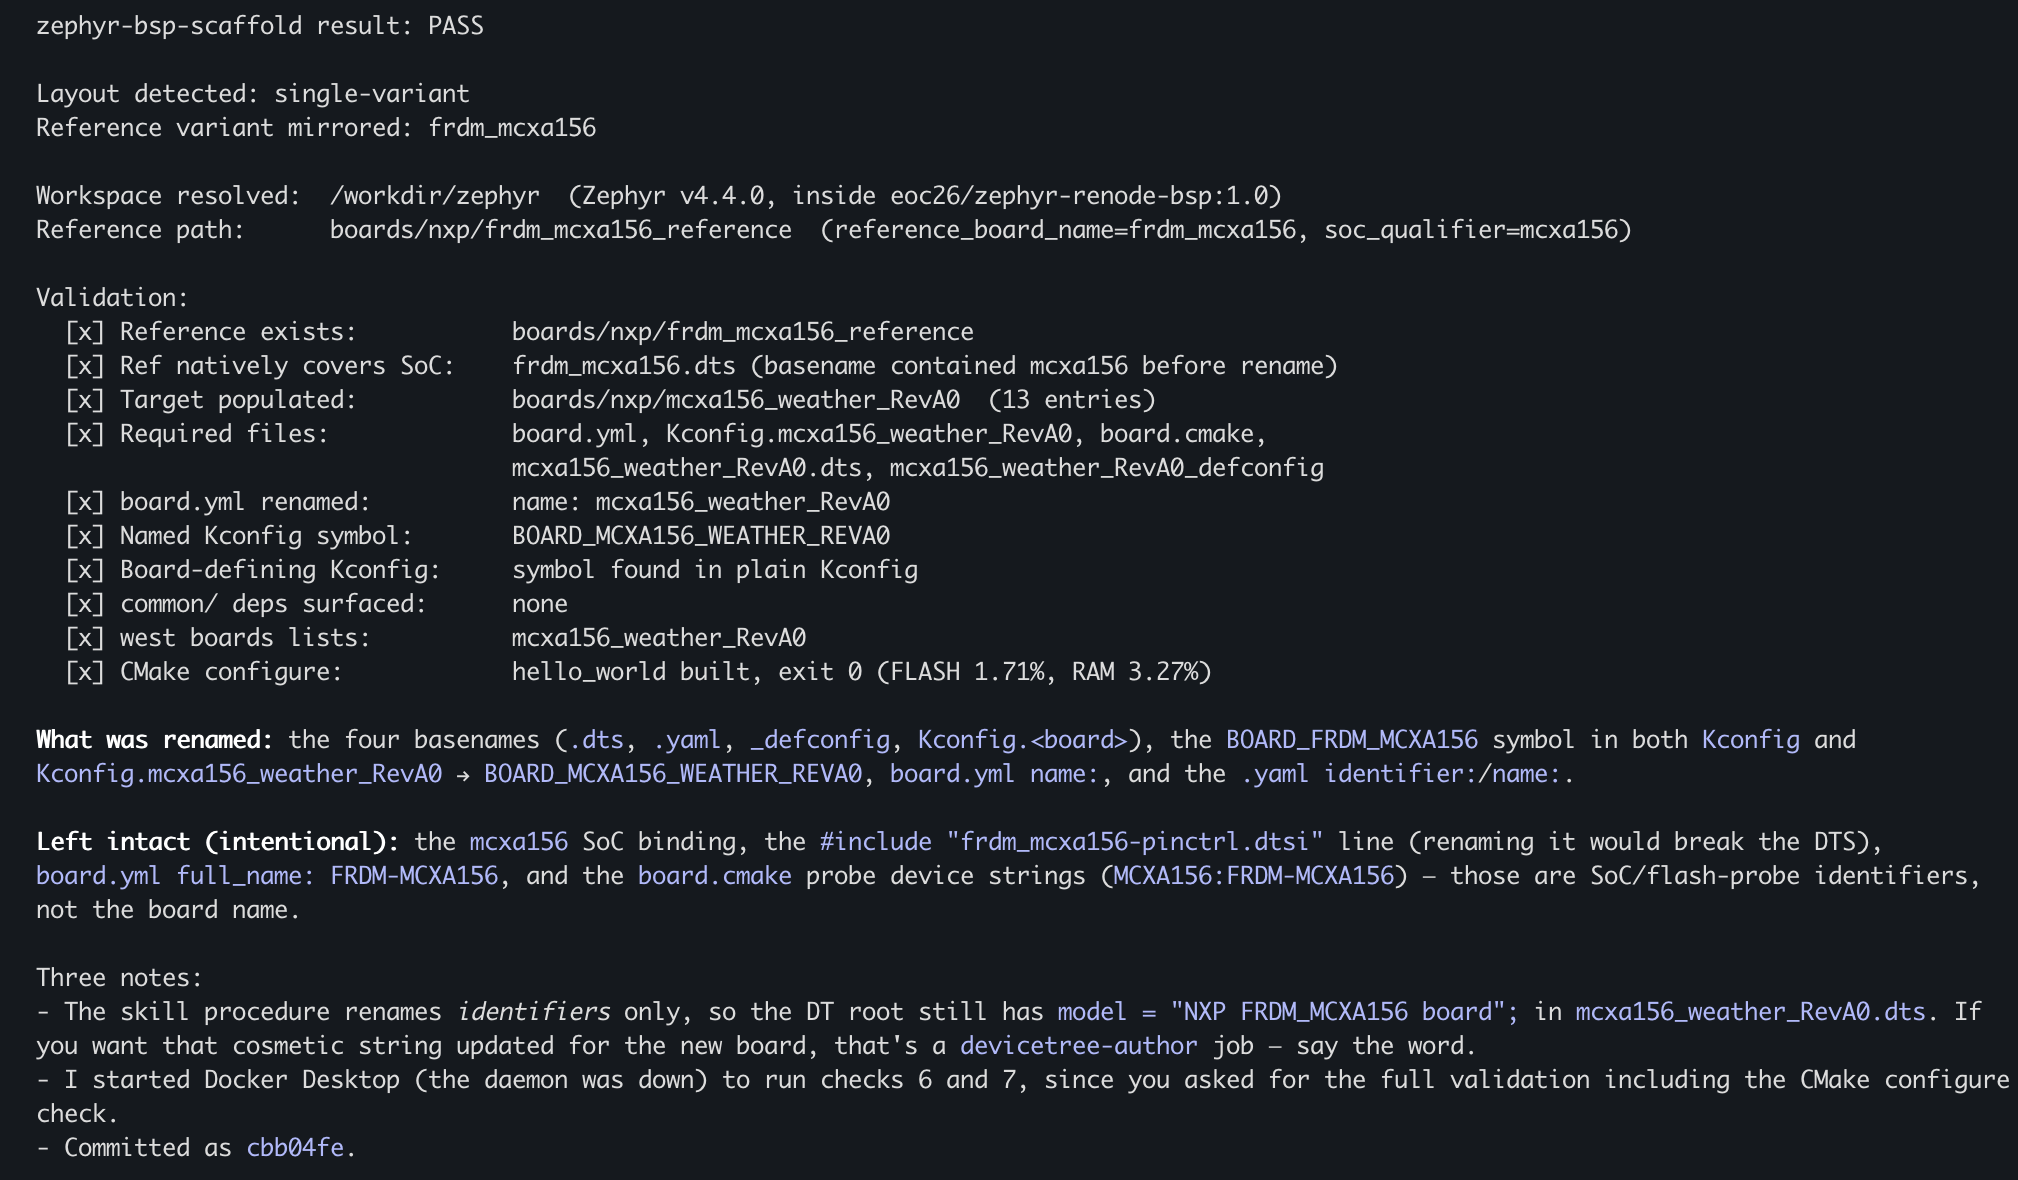
Finally, it proves the Zephyr custom board works before it claims success. This is the part I care about most. After scaffolding, the skill runs a set of binary validation checks: the files exist, board.yml carries the new name, the Kconfig symbols are renamed in every file that defines or references them, west boards actually lists the new board, and a hello_world build configures cleanly against it. Each check passes or fails on its own. No “looks good,” just a board that the toolchain confirms it can see and build.
That last step is the difference between a tool that saves you typing and one you can trust. The hour of careful hand-copying collapses into a single invocation, and you finish with proof that the board is real rather than a hope you didn’t miss a rename.
Try It on Your Own Zephyr Custom Board
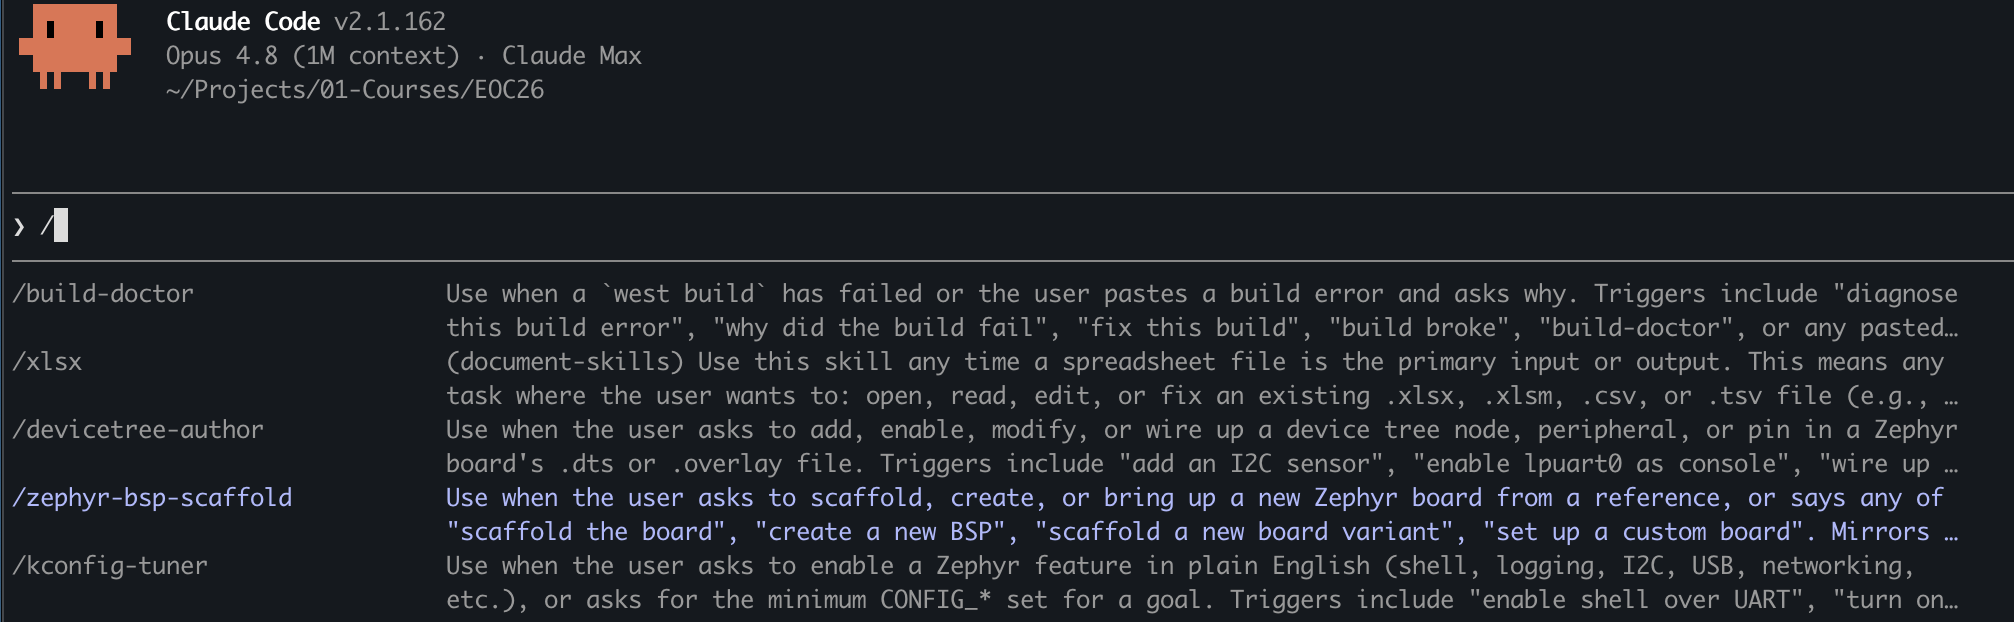
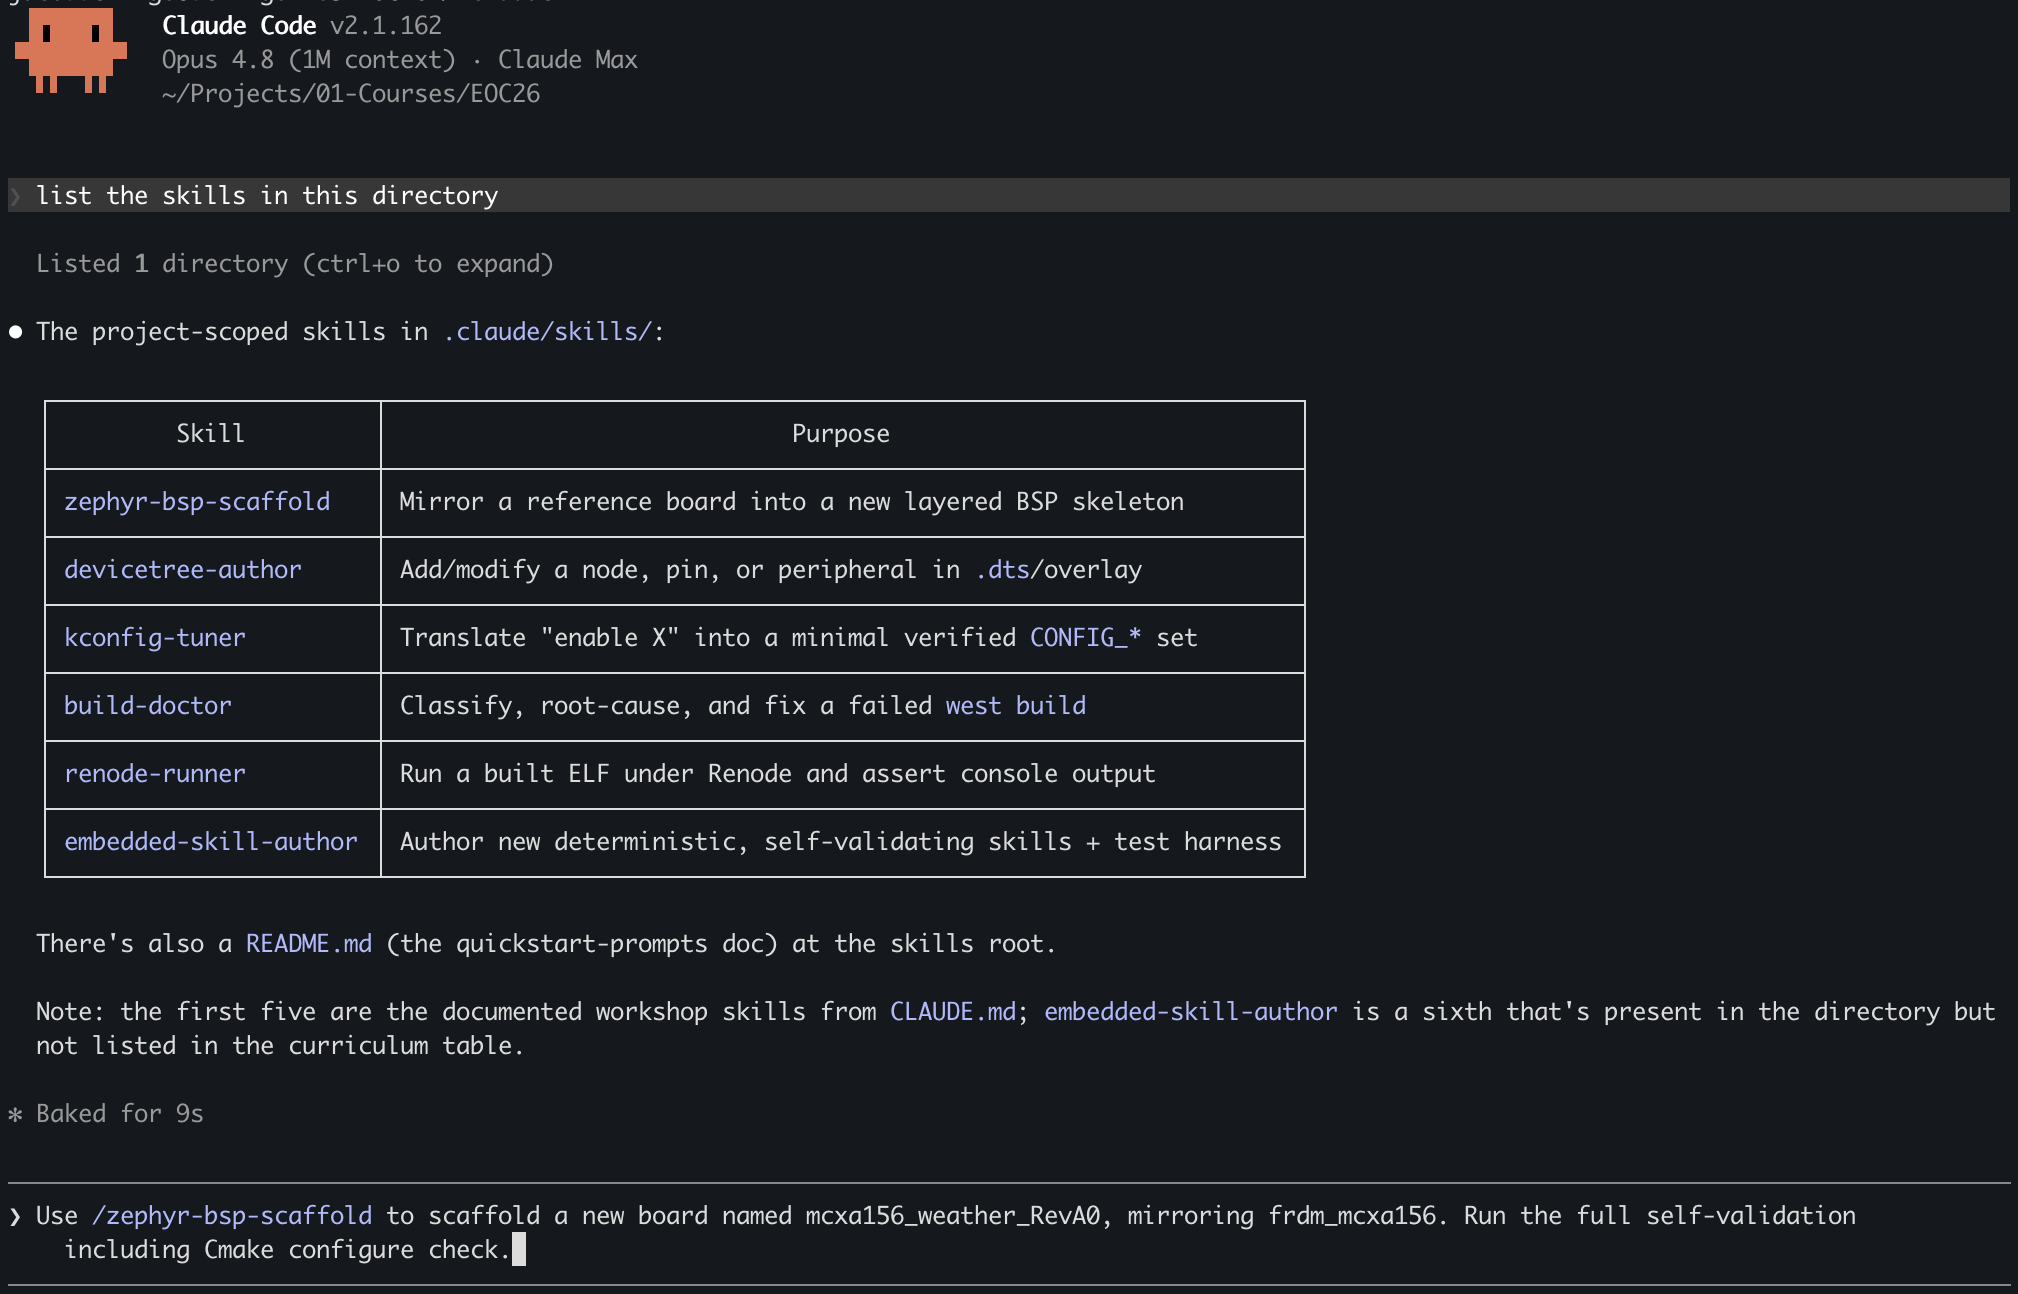
The scaffold skill is one of a small set I use for Zephyr bring-up and development. Below are a few example skills that I’ve developed that help me work with Zephyr and what they do:
| Skill | Purpose |
|---|---|
zephyr-bsp-scaffold | Mirror a reference board into a new layered BSP skeleton |
devicetree-author | Add/modify a node, pin, or peripheral in .dts/overlay |
kconfig-tuner | Translate “enable X” into a minimal verified CONFIG_* set |
build-doctor | Classify, root-cause, and fix a failed west build |
renode-runner | Run a built ELF under Renode and assert console output |
Each one self-validates the same way the scaffold does, so you’re never trusting an unchecked claim.
If you want to run the scaffold step yourself, the skills are packaged and ready to drop into a Claude Code session. You can download them here. Once you have the skills installed, you can use a prompt similar to the one found in Figure 6 or below to create your Zephyr custom board:
ZshUse /zephyr-bsp-scaffold to scaffold a new board named mcxa156_weather_RevA0, mirroring frdm_mcxa156. Run the full self-validation
All you’re doing is pointing it at an in-tree reference close to your target silicon, giving it your board name, and asking it to run the full self-validation. You’ll have a board that west boards lists and that builds hello_world in the time it takes to read this paragraph.
You’ll find that if there are any gaps or questions, the AI will query you to make sure that it develops the board files correctly. When I was working with the RP2350, it turns out there are multiple board examples. The skill found them all and then recommended which one we should use but verified with me which direction I wanted to go.
There is one caveat that I want to point out about the zephyr-bsp-scaffold skill. The skill will provide you with a baseline board based on an existing board in the Zephyr tree or one that you give as an example; however, you still need to wire your overlays and modify your .dts files. That’s where the additional skills come into play.
Your Next Steps
At this point, you should understand a Zephyr custom board for what it is: a small, layered set of files following the Hardware Model v2 layout. Three are mandatory; the rest are optional. You’ve seen how to build one by hand from an in-tree reference, where the unqualified naming shortcut builds today and potentially bites you later, and how the zephyr-bsp-scaffold skill collapses the whole loop into a single self-validated invocation.
Here are a few steps I’d recommend for going deeper:
- Scaffold a Zephyr custom board yourself. Grab the skill package, point it at an in-tree reference close to your target silicon, and ask it to run the full self-validation. Pay attention to the naming: even on a single-SoC part, use the fully qualified
<board>_<soc>form so a future variant doesn’t break the build silently. - Diff your scaffolded board against its reference. Every byte that isn’t a rename is something worth understanding.
diff -ruthe two directories and read what differs; it’s the fastest way to learn what each file controls. - Browse the
boards/tree for a reference in your SoC family. Most “new” boards are variants of something Zephyr already supports. For any target with an in-tree sibling, the path is the same: mirror, rename with full qualifiers, validate, build.
If you want the full hands-on path, from scaffolding a Zephyr custom board to wiring its console, driving a GPIO, and reading an I2C sensor, all verified under Renode without touching hardware, you might also consider taking my Build a Custom Zephyr BSP with AI workshop. It walks through the entire bring-up loop end to end using the same skills shown here, but in greater detail, with step-by-step instructions and some lecture.
In the next post, we’ll revisit the Devicetree and see how we can use the devicetree-author to wire up our devicetree through an Excel spreadsheet, or through ad-hoc prompting. We’ll wire up a UART console on a Zephyr custom board using the FRDM-MCXA156.
Additional Resources
- Download – Zephyr RTOS AI Skills
- Blog: Introduction to the NXP MCX N FRDM Board
- Blog: Getting Started with Zephyr RTOS
- Blog: How to Configure Zephyr RTOS: A Practical Guide to West, Kconfig, proj.conf
- Blog: FreeRTOS to Zephyr Migration: A Step-by-Step Guide for Embedded Developers
- Blog: Mastering the Zephyr RTOS Devicetree and Overlays
- Blog: Zephyr RTOS Sensor API: Unlock On-Board Temperature Sensing
- Blog: Zephyr RTOS: Porting Apps Across Different Boards
- Free Training: Getting Started with MCUXpresso for Visual Studio Code
- Free Webinar: Getting Started with the MCUXpresso SDK for NXP MCUs
- Free Webinar: Migrating from FreeRTOS to Zephyr RTOS
- Free Webinar: Mastering Zephyr Devicetree
Want embedded engineering insights like this delivered to your inbox? Sign up for my Embedded Bytes newsletter to get the latest posts, insights, and hands-on tips delivered straight to your inbox.
Struggling to keep your development skills up to date or facing outdated processes that slow down your team, raise costs, and impact product quality?
Here are 4 ways I can help you:
- Embedded Software Academy: Enhance your skills, streamline your processes, and elevate your architecture. Join my academy for on-demand, hands-on workshops and cutting-edge development resources designed to transform your career and keep you ahead of the curve.
- Consulting Services: Get personalized, expert guidance to streamline your development processes, boost efficiency, and achieve your project goals faster. Partner with us to unlock your team's full potential and drive innovation, ensuring your projects success.
- Team Training and Development: Empower your team with the latest best practices in embedded software. Our expert-led training sessions will equip your team with the skills and knowledge to excel, innovate, and drive your projects to success.
- Customized Design Solutions: Get design and development assistance to enhance efficiency, ensure robust testing, and streamline your development pipeline, driving your projects success.
Take action today to upgrade your skills, optimize your team, and achieve success.